The Ultimate Guide to Retail Lighting: Boost Sales, Brand, and Bottom Line
Ever walked into a store and felt an immediate, undeniable pull towards a particular display? Or perhaps you’ve entered a space that just felt…off, making you want to grab what you need and flee? That powerful, often subconscious reaction isn't magic; it's the strategic art of retail lighting at play! For far too many businesses, lighting remains an overlooked superpower, a silent salesperson capable of transforming browsers into buyers and casual visits into memorable experiences.
Imagine this: Natural light alone can boost retail sales by a significant 6%, and that's just the tip of the iceberg. When you layer in thoughtfully designed artificial lighting, suddenly your merchandise pops, your brand story sings, and your energy bills shrink. But get it wrong, and you're left with flat displays, uncomfortable shoppers, and margins quietly eroded by inefficient systems. This isn't just about aesthetics; it's about your bottom line.
At Find a Lamp, we believe every retail space deserves lighting that works as hard as you do. This comprehensive guide will take you on a journey through everything from understanding the deep psychological impact of light to leveraging AI-driven tools for a fresh, efficient, and unmistakably on-brand in-store experience. Let's illuminate your path to retail success!
Table of Contents
- Understand the Impact: Why Lighting Matters in Retail
- Gather Your Requirements: Standards, Goals, and Site Specifics
- Step-by-Step: The Lighting Selection Process
- Verify and Optimize: Testing, Adjustment, and Energy Management
- A Smarter Future: What Most Retailers Miss in Lighting Selection
- Discover Lighting Solutions Tailored for Your Store
- Frequently Asked Questions
Key Takeaways
| Point | Details |
|---|---|
| Lighting shapes shopper behavior | Effective retail lighting boosts sales, supports branding, and drives customer experience. |
| Follow industry standards | IES guidelines ensure your space meets visual and safety needs for all retail areas. |
| Balance energy and visual goals | Optimizing with LEDs and smart controls reduces costs while enhancing ambiance. |
| Regular optimization is key | Adjust and review lighting regularly to align with changing layouts and promotions. |
Understand the Impact: Why Lighting Matters in Retail
It’s more than just seeing; it’s feeling. The moment a customer steps into your store, their brain processes a cascade of visual cues, and lighting is the lead conductor of that orchestra. If the lighting is harsh and uneven, products can appear cheap, colors can look distorted, and the overall mood can feel unwelcoming. Conversely, well-executed lighting can make a simple t-shirt look like a designer piece, a fresh loaf of bread smell even more appealing, and a fitting room feel like a personal sanctuary.
Lighting directly influences three critical psychological factors for shoppers:
- Perception of Value: A product bathed in a warm, focused spotlight with excellent color rendering (CRI) immediately looks more premium, more desirable, and more expensive than the exact same item under a bland, fluorescent glow.
- Emotional Comfort: Bright, cool lighting might suit a discount store, signaling efficiency and value. But for a luxury boutique, warm, softer, and more intimate lighting fosters a sense of exclusivity and relaxation, encouraging longer dwell times and considered purchases.
- Navigation & Dwell Time: Strategically placed accent lighting naturally draws the eye, guiding shoppers through your store to key displays and high-margin products. When customers feel comfortable and can easily find what they’re looking for (or discover something new!), they spend more time and, inevitably, more money.
For visual merchandising, understanding the interplay between different lighting layers is everything:
- Ambient Lighting: This is your general illumination, filling the room and setting the baseline mood. Think recessed downlights, linear fixtures, or large panels that provide uniform brightness for comfortable navigation. It establishes the overall energy and brightness of the space.
- Accent Lighting: This is the drama queen! Directional and dynamic, accent lighting (like track lights, spotlights, or adjustable recessed fixtures) highlights specific products, displays, or architectural features. It creates contrast, draws the eye, and makes merchandise "pop." It's what makes a diamond sparkle or a fabric's texture truly come alive. Studies consistently show that well-executed accent lighting increases dwell time because customers naturally gravitate toward these illuminated zones, spending more time examining products they might otherwise walk past.
- Task Lighting: Functional and focused, task lighting ensures staff can perform duties efficiently and accurately, whether at the cash register, in a stockroom, or at a consultation desk. It also includes lighting in fitting rooms, where flattering illumination is paramount for customer confidence.
- Decorative Lighting: While it may not provide significant illumination, decorative lighting (chandeliers, pendants, wall sconces) makes a powerful brand statement. It reinforces your store's aesthetic, adding personality and visual interest.
The energy dimension is equally compelling. Upgrading to modern, efficiently controlled LED fixtures isn't just an environmental choice; it's a shrewd financial one. LEDs can reduce energy usage by 70-90% compared to traditional sources, and their extended lifespan (often 50,000+ hours) dramatically slashes maintenance costs. The real ROI comes when you combine efficient LED sources with smart controls that respond to occupancy, daylight levels, and time of day, creating a dynamic, energy-saving, and inviting environment.
Key reasons why lighting directly affects your retail performance:
- Sales Lift: Natural and well-designed artificial light increases purchase rates on featured merchandise.
- Brand Atmosphere: Warm, dim light communicates luxury and intimacy; cool, bright light signals energy and value. This is largely controlled by Correlated Color Temperature (CCT), measured in Kelvins (K). Think 2700K for cozy, 4000K for crisp, and 5000K+ for bright, daylight-like clarity.
- Staff Productivity: Proper task lighting in stockrooms and registers reduces errors, improves focus, and reduces fatigue.
- Energy Spend: Lighting typically accounts for 30 to 40 percent of a retail store’s total electricity use, making it the single largest controllable energy cost.
We explore even more on the psychology and design side of this in our lighting insights, if you want to dig into the nuances before committing to any purchases. Now that you understand the stakes, let’s look at what you need to get started.
Gather Your Requirements: Standards, Goals, and Site Specifics
Before you select a single fixture, you need a clear inventory of your space, your brand goals, and the professional benchmarks that guide effective retail illumination. Skipping this step is why so many retailers end up with lighting that looks fine at first but fails to perform optimally over time, leading to missed sales opportunities and higher operational costs.
The first thing to gather is your spatial data: precise room types (sales floor, fitting rooms, stockroom, registers, window displays), exact square footage for each, ceiling heights, and the locations of fixed and flexible display zones. These specifics directly influence which fixture types, beam angles, and lumen outputs are appropriate. For example, a grand department store with 18-foot ceilings will require powerful, narrow-beam track lights to reach displays effectively, whereas a compact boutique with 9-foot ceilings might use wider-beam downlights and wall grazers. What works beautifully to highlight a feature wall display will overwhelm a fitting room where flattering, diffuse light matters most.
Next, acquaint yourself with professional standards. The Illuminating Engineering Society (IES) publishes comprehensive standards like RP-2-20, which details retail lighting guidelines. These aren't just abstract rules; they're evidence-based benchmarks developed by lighting engineers who studied how shoppers actually respond to different lighting conditions. They cover target illuminance levels (measured in lux or foot-candles), contrast ratios for dramatic effect, Color Rendering Index (CRI) requirements for accurate product appearance, and recommendations for vertical illuminance on displays and faces. Using these as your baseline saves you from costly trial-and-error and ensures your space is not only beautiful but also functional and compliant.
The room-by-room lighting requirements also vary significantly depending on what you’re selling and your brand's aesthetic. Consider these examples:
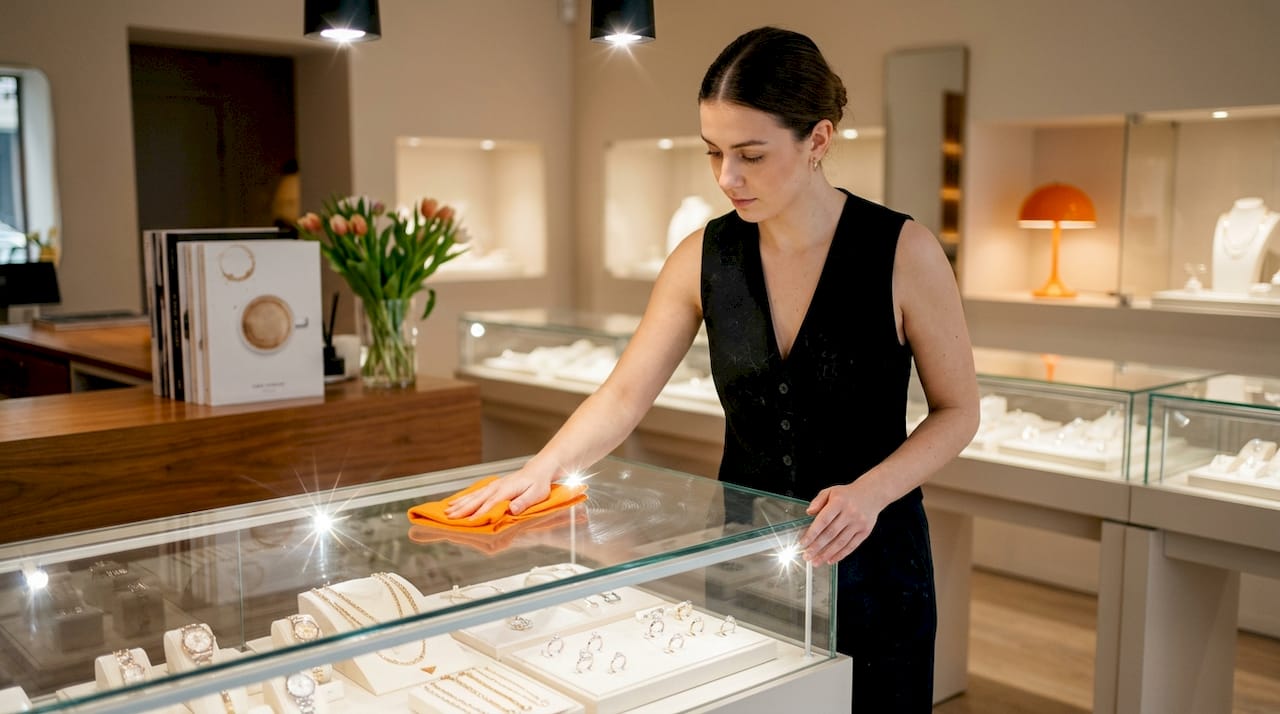
- Jewelry Store: Needs extremely high contrast ratios (often 10:1 or more) to create sparkle and brilliance, paired with a very high CRI (90+) to ensure diamonds and gemstones appear true to color. Focused spotlights are key.
- Grocery Store: Requires bright, clean, high-CRI ambient light (especially in produce and meat sections) to make food look fresh and appetizing. Specific color temperatures can enhance the vibrancy of certain items.
- Fashion Boutique: Demands a sophisticated, layered approach. High-CRI accent lighting on garments, flattering diffuse light in fitting rooms (often 3000K-3500K for a warm, yet accurate glow), and decorative elements to reinforce brand luxury or trendiness.
- Electronics Store: Often utilizes brighter, cooler ambient light (4000K-5000K) to create a high-tech, energetic feel, with precise accent lighting to highlight product features without glare on screens.
- Furniture Showroom: Benefits from flexible lighting systems that can adapt to changing layouts, often mimicking residential lighting scenarios to help customers visualize pieces in their own homes.
Here’s a practical requirements checklist to complete before you start shopping:
| Requirement | Details to gather |
|---|---|
| Space dimensions | Floor area, ceiling height per zone, column locations, window positions. |
| Display zones | Fixed vs. flexible, key feature areas, gondola layout, wall displays, mannequins. |
| Target illuminance | General floor: 300-500 lux; displays: up to 1,500 lux; fitting rooms/cashier: 500-750 lux. |
| Color rendering (CRI) | Minimum 80 for general areas, preferably 90+ for fashion, food, cosmetics, and art. |
| Color Temperature (CCT) | Warm (2700-3000K) for luxury/cozy, Neutral (3500-4000K) for general, Cool (4000K+) for modern/energetic. |
| Energy targets | Maximum watts per square foot (often dictated by local building codes), desired energy savings percentage. |
| Controls needed | Dimming (0-10V, DALI, phase), occupancy/vacancy sensors, daylight harvesting, scene presets, smart integration. |
| Campaign flexibility | Seasonal changeover frequency, need for adjustable fixtures, DMX or smart controls for dynamic scenes. |
| Maintenance access | Fixture height, lamp replacement frequency, staff capability for relamping/cleaning, budget for specialized maintenance. |
Pro Tip: Talk to your store manager and sales staff before finalizing requirements. They know which areas feel uncomfortable to work in, where customers avoid lingering, and where the lighting currently fails to highlight products effectively. Their frontline feedback is often more actionable than any design brief alone.
With your requirements clearly mapped out, you’re ready to proceed with an efficient, step-by-step selection process.
Step-by-Step: The Lighting Selection Process
This is where your meticulous planning truly pays off. The selection process is not simply about picking attractive fixtures; it’s a structured sequence of decisions that balance aesthetics, performance, energy efficiency, and budget. Moving through these steps in order prevents the most common (and expensive) mistakes.
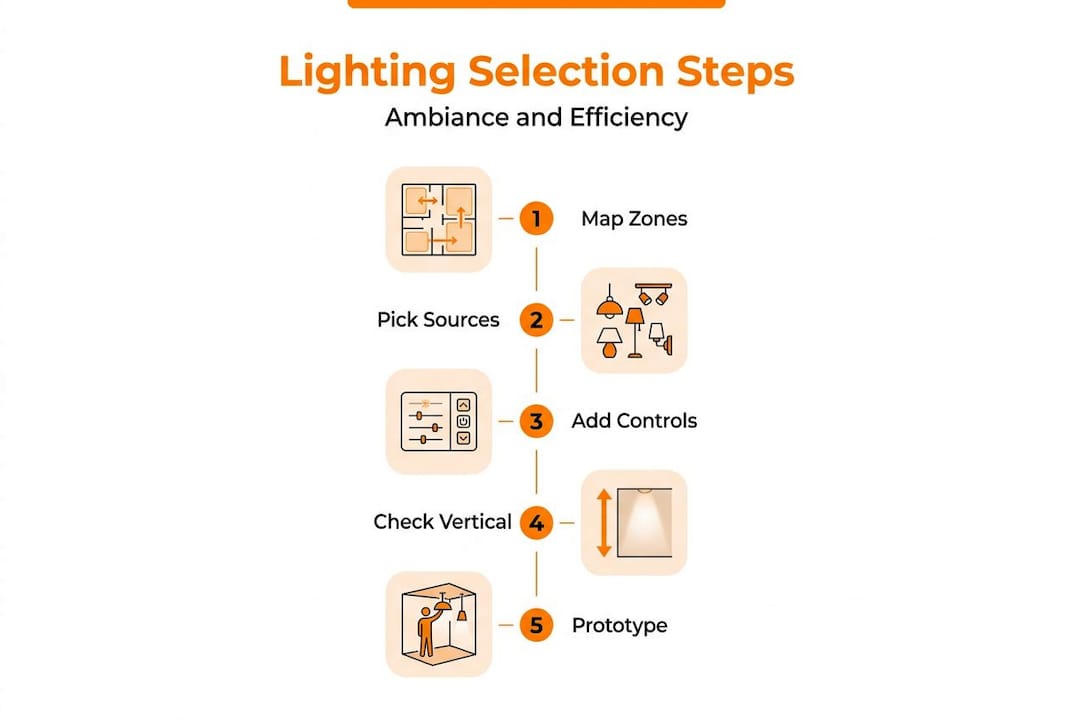
Step 1: Map Your Lighting Layers Against Your Space
Every dynamic retail environment needs at least three of the four lighting layers: ambient, accent, task, and decorative. Start by marking each distinct zone on a detailed floor plan and assigning which layers it requires. For example, your main sales floor might need robust ambient lighting for general visibility, accent lighting for product displays, and decorative pendants to enhance brand identity. Cashier areas will require bright task lighting, while fitting rooms need a combination of flattering ambient and task lighting.
Step 2: Choose Your Light Sources (Go LED!)
LED technology is the non-negotiable baseline for new installations and retrofits in 2026. Why? LEDs can reduce energy usage by 70 to 90% compared to traditional halogen or fluorescent sources, and they last up to 25 times longer, dramatically reducing maintenance costs. But it's not just about efficiency; modern LEDs offer incredible control over color temperature (CCT), color rendering (CRI), and beam angles. For accent fixtures, pay close attention to:
- Beam Angle: A narrow beam (e.g., 10-20 degrees) creates a dramatic spotlight effect, perfect for jewelry or small, high-value items. A flood beam (e.g., 40-60 degrees) is better for washing larger displays or architectural features.
- CRI: Always aim for 80+ CRI for general retail, and 90+ CRI for fashion, cosmetics, food, or any merchandise where true color representation is crucial.
- CCT: Match the color temperature to your brand's atmosphere. Warm white (2700K-3000K) for a cozy, luxurious feel; neutral white (3500K-4000K) for a clean, modern look; cool white (4000K-5000K) for high-energy or tech-focused spaces.
Step 3: Select Smart Controls
Sensors and dimming systems are not optional luxuries; they are essential tools that can save an additional 30 to 50% on top of the savings from switching to LEDs. More importantly, they offer unparalleled flexibility and enhance the customer experience. Consider:
- Occupancy Sensors: Prevent wasted energy in low-traffic areas like stockrooms or restrooms, ensuring lights are only on when needed.
- Daylight-Harvesting Controls: Automatically dim interior lights when sufficient natural light is available, maintaining consistent lux levels while saving energy.
- Dimming Systems: Allow you to adjust brightness based on time of day, promotions, or store events, creating different moods and saving energy.
- Scene Programming: Advanced DMX or smart lighting protocols (like Bluetooth Mesh or Wi-Fi-based systems) allow you to program multiple lighting scenes for seasonal campaigns, morning/evening shifts, or special events, all at the touch of a button without touching a single fixture. Smart lighting systems offer incredible versatility.
Step 4: Prioritize Vertical Illuminance
This is one of the most overlooked principles in retail lighting, yet it's absolutely critical for making products look appealing. Vertical and cylindrical illuminance affects how faces and products appear in three-dimensional displays, and it’s just as important as the horizontal foot-candles on your floor. If your track lighting is aimed only at shelving from directly above, the product faces and any vertical surfaces will be underlit, making merchandise appear flat and uninviting. To get that luminous, appealing quality, angle your accent fixtures between 25 and 45 degrees from vertical, ensuring light hits the front of your products and the faces of your mannequins.
Step 5: Prototype and Compare
Before committing to a full installation, test your selected fixtures in a representative section of your store. Compare at least two options for your main accent and ambient sources. Evaluate them at different times of day, with actual merchandise in place. What looks spectacular in a showroom can fall flat in your specific space. Look for:
- Glare: Are there any uncomfortable bright spots for shoppers or staff?
- Shadows: Are products well-lit without harsh, distracting shadows?
- Color Rendition: Do your products look true to color and vibrant?
- Ambiance: Does the overall lighting create the desired mood and brand feeling?
| Lighting type | Best technology | Typical application | Key metric | Example Fixture |
|---|---|---|---|---|
| Ambient | LED panel or linear, recessed downlights | Sales floor fill, general illumination | 300 to 500 lux, uniform distribution | LED troffer, architectural recessed downlight |
| Accent | LED track or adjustable recessed downlight | Feature displays, mannequins, wall washes | Up to 1,500 lux, high CRI, precise beam angle | LED track head, adjustable gimbal recessed light |
| Task | LED under-cabinet, recessed, pendant | Registers, fitting rooms, stockrooms, consultation areas | 500 to 750 lux, low glare | LED linear task light, diffuse recessed fixture |
| Decorative | Pendant, chandelier, custom fixtures, wall sconces | Brand statement zones, visual interest, focal points | Visual impact, aesthetic alignment, minimal functional light | Oversized pendant, sculptural chandelier |
Pro Tip: Review our guidance on home office lighting steps for a transferable methodology around matching task performance with aesthetic intent. The same logic applies beautifully to retail service desks and consultation areas, where clarity and comfort are paramount.
Having made your selections, it’s vital to ensure those choices perform as expected, and to know how to troubleshoot common issues.
Verify and Optimize: Testing, Adjustment, and Energy Management
Selecting great fixtures is only half the work. The other half is verifying performance after installation and setting up a rhythm of ongoing optimization that keeps your store looking and performing at its best through seasonal changes, campaigns, and evolving traffic patterns. Think of your lighting system as a living, breathing part of your retail ecosystem, requiring continuous care and adjustment.
How to Verify Post-Installation Performance:
- Measure Illuminance with a Light Meter: Don't just eyeball it! Use a digital light meter to confirm that ambient zones hit your target lux levels (typically 300 to 500 lux on the sales floor) and that accent zones reach the higher levels appropriate for your merchandise category (e.g., 750-1500 lux). Measure both horizontal (floor/shelf) and vertical (product face) illuminance.
- Check for Glare: Walk the entire floor at shopper eye level, not just designer eye level. Glare from unshielded sources, overly bright ceilings, or reflections creates discomfort that shoppers feel but can’t always articulate, and it drives them out. Adjust beam angles, add diffusers, or reposition fixtures if glare is an issue.
- Evaluate Color Rendering in Context: Place your hero products under the installed accent fixtures and compare them to how they look in natural daylight or under a known high-CRI source. A CRI below 80 can make fabrics, food, or cosmetics look dull, washed out, or even the wrong color.
- Observe Shopper Flow: Within the first few weeks after installation, watch where customers naturally gravitate. Well-placed accent lighting should be drawing them toward your high-margin displays, encouraging longer dwell times. Are there "dead zones" where customers don't linger? Lighting might be the culprit.
- Review Energy Consumption Data: If your controls are connected to a building management system or smart lighting platform, pull usage data weekly for the first month. This confirms that sensors and dimming schedules are functioning as intended and delivering the projected energy savings.
“High-end trim” programming in modern dimming systems sets a maximum output level that prevents overlighting, protects fixture longevity, and ensures that sensors and dimming consistently deliver 30 to 50% savings without any visible compromise to ambiance. It's a simple, yet powerful way to cap energy waste without sacrificing visual impact.
For Ongoing Optimization, Build a Periodic Review Cadence:
- Monthly:
- Visually inspect fixtures for dust buildup or signs of wear.
- Check that all controls (dimmers, sensors) are functioning correctly.
- Note any areas where lighting seems inconsistent or problematic.
- Seasonally (or with major campaigns):
- Reprogram scene presets to match new seasonal campaigns, product launches, or promotional events.
- Reposition and re-aim adjustable accent fixtures to highlight new merchandise layouts.
- Consider adjusting CCT slightly to align with seasonal moods (e.g., warmer for winter holidays, cooler for summer collections).
- Annually:
- Conduct a full illuminance measurement audit across the entire store to ensure consistent performance.
- Compare energy data year over year to track savings and identify potential inefficiencies.
- Assess whether any zones need fixture upgrades to keep pace with technology or evolving brand aesthetics.
- Gather feedback from staff and customers on lighting comfort and effectiveness.
Explore how other spaces have been transformed with intentional room-by-room case studies to get a feel for what systematic lighting reviews can uncover. You’ve mastered the essential selection and verification process. But what are most guides missing when it comes to future-proofing your retail lighting?
A Smarter Future: What Most Retailers Miss in Lighting Selection
Here’s the honest truth we’ve observed working with retail environments at every scale: most retailers treat lighting as infrastructure, something you install and forget. They optimize for opening day and then let that configuration run unchanged for years, even as their product mix evolves, their customer demographics shift, and new campaign priorities emerge. That “set and forget” mindset is quietly costing them far more than any energy inefficiency.
Improve your room
Explore lamps tailored to your home with our AI driven recommendations.
Find Lamps