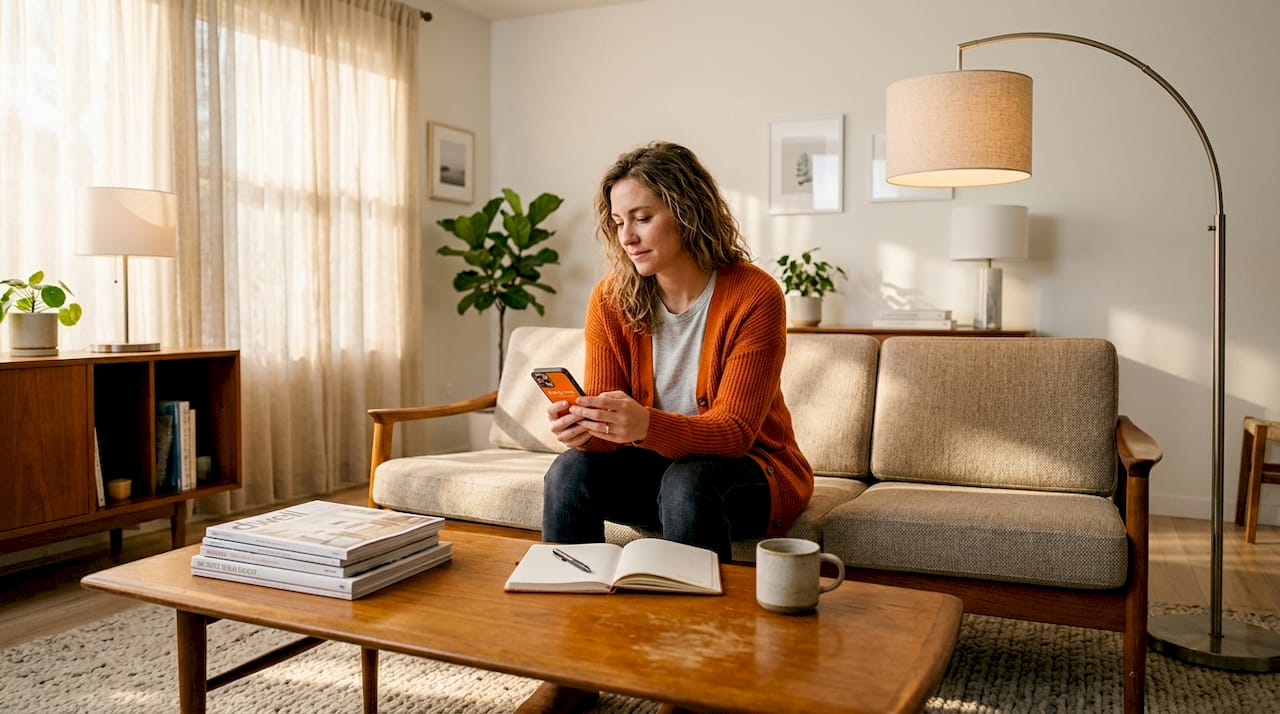
Most of us have been there: a room that looks beautiful in a magazine but feels oddly flat or harsh in real life, despite the fact that you’ve added more fixtures and swapped in brighter bulbs. The instinct to simply pile on more light is understandable, but it rarely solves the deeper issue. What actually transforms a room from adequate to extraordinary is a deliberate process called room lighting assessment, a method that evaluates how light behaves throughout your specific space and tailors every fixture, layer, and lumen to the way you actually live. This guide walks you through everything, from the core concepts to the hands-on calculations that make a real difference.
Table of Contents
- What is room lighting assessment?
- The Science of Light: Core Methodology, Measurement, and Standards
- Beyond Brightness: The Art of Layered Lighting
- Navigating the Nuances: Edge Cases and Practical DIY Solutions
- The Human Element: What Most Lighting Guides Miss
- Your Personal Lighting Journey Starts Here with Find a Lamp
- Frequently asked questions
Key Takeaways
| Point | Details |
|---|---|
| Assessment basics | Room lighting assessment evaluates light levels, layout, and ambiance for optimal comfort and function. |
| Follow benchmarks | Rooms should match recommended lux levels for their purpose, avoiding under- or over-lighting. |
| Layering matters | Mix ambient, task, and accent lighting for flexibility and mood, using dimmers when possible. |
| DIY tools help | Floorplans, calculators, and apps make lighting assessment accessible for homeowners and renters. |
| Adapt for edge cases | High ceilings, finishes, and daylight require adjustments; uniformity and maintenance ensure lasting results. |
What is room lighting assessment?
Now that you understand the need for more than just extra lights, let’s define the process that guarantees a comfortable, functional ambiance.
At its core, room lighting assessment is “the process of evaluating and calculating the appropriate lighting levels, fixture placement, and layering for a room to achieve optimal illuminance (lux), uniformity, and ambiance based on room function, size, and activities.” That definition packs in several key terms worth unpacking one by one, because each one directly shapes how your space feels and performs.
Let's break down the big three:
-
Illuminance (Lux): This is the quantity of light falling on a surface, measured in lux (one lux equals one lumen per square meter). Think of it as the brightness of the surfaces you see. Too little, and a room feels dim and unusable; too much, and it’s harsh and overwhelming.
-
Uniformity: This refers to how evenly light spreads across the space. Imagine a desk with a bright spot directly under a lamp, but everything else is in shadow – that's poor uniformity. Good uniformity ensures a comfortable visual experience, minimizing eye strain and making the entire room feel balanced, without stark contrasts between bright and dark areas.
-
Ambiance: This is the emotional atmosphere created by the combination of light quantity, color temperature, and direction working together. It’s the "feel" of the room. Ambiance transforms a mere space into a welcoming sanctuary or an energetic hub. It’s what makes a bedroom cozy or a kitchen vibrant.
These three factors are inseparable. You could hit a perfect lux level but destroy the mood if the light is harsh and uniform in the wrong way (think interrogation room, not living room). The IES lighting standards, published by the Illuminating Engineering Society, provide the benchmarks that professionals use to navigate this balance, and they are worth bookmarking as a reference. These standards aren't just about brightness; they consider visual comfort, task performance, and energy efficiency, offering a holistic approach to lighting design.
Layering and fixture placement sit at the heart of any great assessment. Rather than relying on a single overhead source, assessment-driven design strategically positions multiple fixtures to serve different purposes simultaneously. Our room by room lighting guide explores how each space in your home carries unique requirements, from the focused task lighting a kitchen demands to the warm, enveloping glow a bedroom craves.
“Good lighting assessment doesn’t just count lumens, it choreographs them so that every corner of a room earns its place in the composition.”
Key concepts to carry forward from this section:
- Lux measures illuminance at a surface level (how much light arrives).
- Lumens measure the total light output of a source (how much light is emitted).
- Uniformity ratio describes how evenly light is distributed (min lux / average lux).
- Ambiance is shaped by color temperature, direction, and layering, not just brightness.
The Science of Light: Core Methodology, Measurement, and Standards
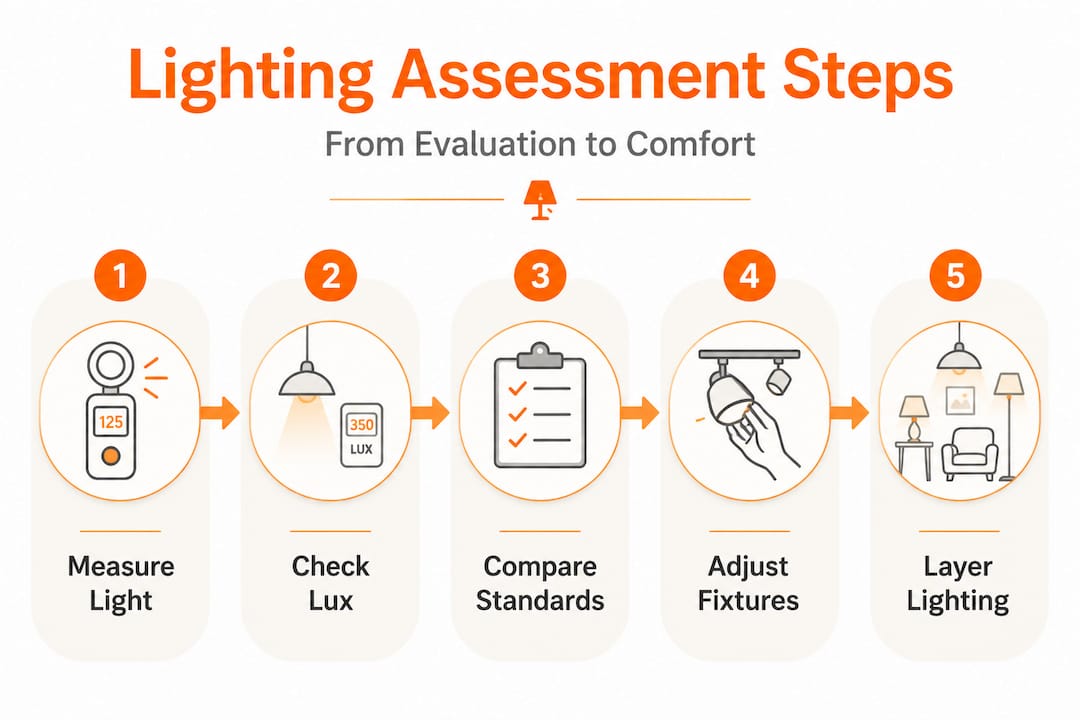
With a clear understanding of what assessment involves, let’s walk through how professionals and savvy DIYers actually perform a lighting assessment, from measurements to standards.
The professional framework for room lighting assessment, as outlined by lighting calculation tools, involves “measuring room area, selecting target illuminance by room type and activity, accounting for ceiling height, room finishes, daylight, light loss factor (LLF 0.7-0.9), and coefficient of utilization (CU 0.3-0.85).” Each of those variables plays a distinct role in the final calculation, and understanding them even roughly puts you miles ahead of the average homeowner guessing at bulb wattage.
Here is a straightforward numbered process to get you started:
-
Measure your room. Start with the basics! Calculate the floor area in square meters (length x width). Note ceiling height separately, as it significantly impacts how light disperses. A taller ceiling means light has further to travel, requiring more powerful sources or more fixtures.
-
Select your target lux level. Use the table below as your guide. Remember that different activities within the same room may need different levels, so plan for zones. For example, a kitchen needs higher lux over countertops than in a casual dining nook.
-
Calculate total lumens needed. This is where the magic begins. Multiply your target lux by the room area (in square meters). Then, divide this by the CU (coefficient of utilization, typically 0.5 for an average room with mid-tone finishes). The CU accounts for how efficiently your fixtures deliver light to the working plane, considering the room's shape and surface reflectances.
-
Apply the LLF (light loss factor). Divide your result by the LLF (usually around 0.8) to account for the gradual depreciation of bulbs and fixture efficiency over time. Bulbs dim with age, and dust accumulates on fixtures, reducing their output. The LLF ensures your lighting remains adequate throughout its service life.
-
Distribute across fixtures. Finally, divide the total lumens needed by the actual lumen output of your chosen bulb or fixture to determine how many you need. This step helps you decide if you need two pendants, four recessed lights, or a combination.
Recommended lux benchmarks by room type
The following lux benchmarks provide a reliable baseline for residential spaces. Remember these are guidelines; personal preference and specific activities might nudge you slightly higher or lower.
| Room | General lux range | Task area lux |
|---|---|---|
| Living room | 100 to 300 lux | 300 to 500 lux (reading, hobbies) |
| Bedroom | 100 to 200 lux | 300 lux (makeup, reading) |
| Kitchen | 150 to 300 lux | 300 to 500+ lux (countertops, sink) |
| Bathroom | 200 to 500 lux | 500+ lux (vanity mirror) |
| Hallway | 50 to 150 lux | N/A |
The room index K (also called the room cavity ratio) is a dimensionless number that describes the geometry of your room relative to the fixtures. A low K value means a narrow, tall room where light must travel far to reach the floor, making it harder to achieve uniform light. A high K value means a wide, low-ceilinged room where light spreads more easily. Most online calculators handle K automatically, but knowing it exists helps you interpret why a large open-plan kitchen might need fewer fixtures than a narrow galley of the same square footage.
Pro Tip: When designing initial lighting, aim for 20 to 30 percent more lumens than your final target. Bulbs depreciate over time, and this buffer ensures your space stays above the minimum comfortable lux threshold well into the fixture’s life. This practice of designing above target is called the maintenance factor, and it safeguards long-term comfort without requiring early fixture replacement.
Our guide to layered lighting takes these calculations further and shows you how to weave them into a cohesive design plan. For even deeper reading, explore our lighting insights for the latest thinking on residential design.
Beyond Brightness: The Art of Layered Lighting
After calculating the right lighting levels, combining different types of lighting ensures your space feels welcoming and works for every activity.
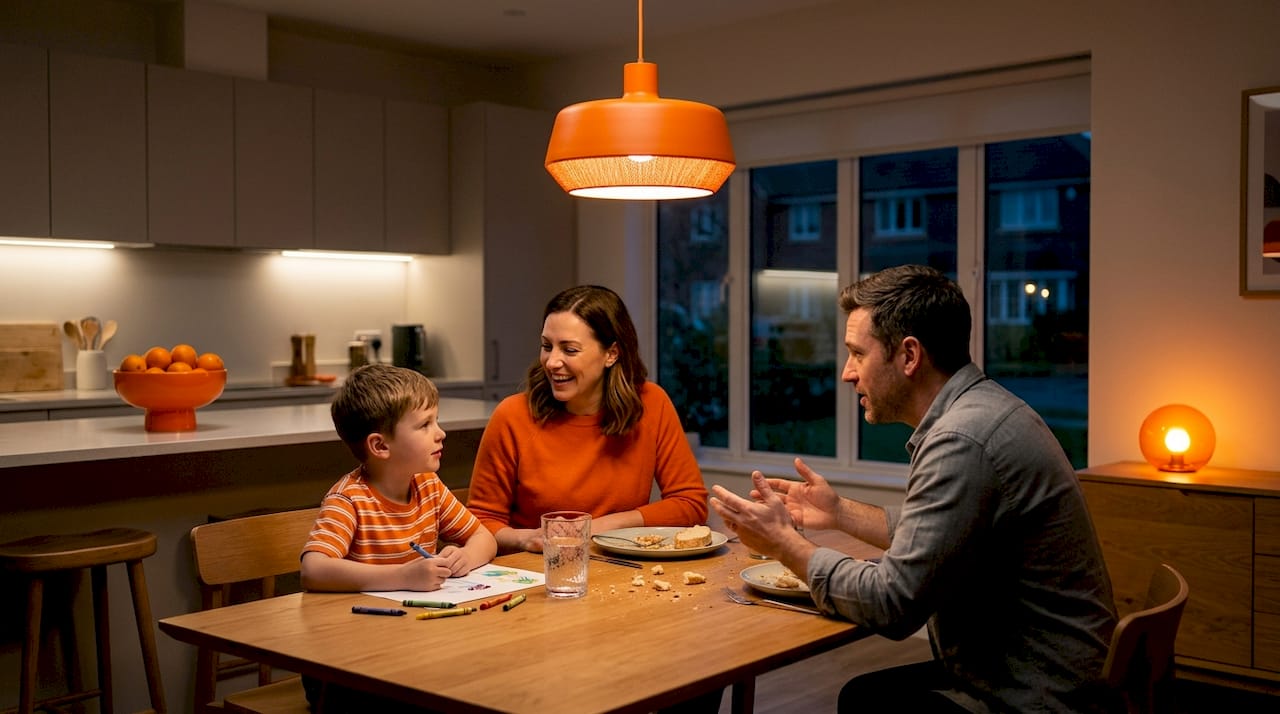
Layered lighting is the design industry’s gold standard: “Ambient (overall), Task (focused work), Accent (decorative). Combine 2-3 layers per room with dimmers for flexibility.” Each layer serves a distinct function, and the magic happens when they work in concert rather than competing for attention.
The three layers explained
| Layer | Primary purpose | Best fixture types | Ideal use cases |
|---|---|---|---|
| Ambient | General illumination, sets baseline lux | Recessed downlights, ceiling pendants, flush mounts, track lighting | Overall room brightness, safety, navigation, creating a base glow |
| Task | Focused, higher-lux light for specific activities | Under-cabinet strips, desk lamps, vanity bars, floor lamps with adjustable heads | Reading, cooking, applying makeup, working, hobbies, detailed crafts |
| Accent | Decorative, creates depth and visual interest, highlights features | Wall sconces, picture lights, LED tape, uplighters, small spotlights, cabinet lighting | Highlighting art, architectural features, textured walls, plants, bookshelves |
The layered lighting guide we’ve put together goes into extraordinary detail on fixture pairings for each room type, but here are the core DIY strategies to mix layers effectively:
-
Install dimmers on every circuit you can. This is non-negotiable! A dimmer transforms a single fixture into a multi-mood tool, giving you a living room that’s bright for Sunday brunch and intimate for a Saturday evening without changing a single bulb. Dimmers offer unparalleled flexibility and control over your space's atmosphere.
-
Layer from the ceiling down. Think of it as building your lighting design strategically. Start with ambient light to establish a comfortable base, then add task lighting precisely where activities happen, and finally, introduce accent lighting as a sculptural flourish to bring personality and depth. This sequential thinking prevents over-lighting and ensures every fixture has a distinct purpose.
-
Avoid symmetry for accent lighting. While ambient lighting often benefits from even distribution, perfectly centered accent fixtures can feel static and predictable. Offset them to create visual tension and depth, the way a skilled photographer uses asymmetry to make a composition feel alive. Think about how light and shadow play together to create drama.
-
Warm up your accent layer. Task lighting tends toward cooler, neutral tones (3000 to 4000 Kelvin) for clarity and focus. Accent lighting, however, almost always benefits from a warmer glow (2200 to 2700 Kelvin) to feel inviting, cozy, and artful rather than clinical. This warmth enhances textures and colors, making a room feel more welcoming.
-
Test before you commit. Use plug-in sconces, battery-operated LED strips, or even just a flashlight to experiment with accent placement and beam angles before cutting into walls or ceilings. This approach saves significant time, cost, and potential headaches, allowing you to visualize and refine your design in real-time.
Thinking of your room as having three distinct lighting conversations happening simultaneously, rather than one loud monologue from above, changes everything about how you shop for and position fixtures. It's about creating a dynamic, adaptable environment that truly reflects your lifestyle.
Navigating the Nuances: Edge Cases and Practical DIY Solutions
Beyond the basics, many rooms present unique challenges, but simple strategies and tools can help anyone achieve great results.
The standard lumen method works beautifully for an average room with 8-foot ceilings and mid-tone painted walls. Real homes, of course, are rarely average. Several key edge cases deserve specific attention: “High ceilings require more lumens (inverse square law); dark finishes lower CU; older adults/low vision need higher lux (500+); daylight reduces artificial needs.”
-
High ceilings are perhaps the most common challenge. The inverse square law tells us that light intensity drops dramatically with distance. Double the ceiling height and you roughly quadruple the lumens needed to hit the same floor-level lux. In a room with 12-foot ceilings, recessed downlights often need to be supplemented with floor lamps, statement chandeliers that hang lower, or mid-height wall sconces that bring light closer to where people actually live and interact.
-
Dark finishes on walls, ceilings, and floors absorb light rather than reflecting it, effectively lowering your room’s Coefficient of Utilization (CU). A room painted in deep charcoal or lined with dark wood paneling may need 30 to 40 percent more lumens than the same room in white or light neutrals. Using lighter finishes on at least the ceiling dramatically improves light distribution and perception of brightness, even when walls and floors stay dark.
-
Aging eyes and low-vision needs are often overlooked in residential design, yet they are critically important for comfort and safety. Adults over 60 typically need two to three times more illumination than younger people to achieve the same visual clarity. Targeting 500 lux or higher in activity areas, combined with higher CRI (color rendering index) sources above 90, makes a profound functional difference. Consider brighter, diffused task lighting and avoid harsh shadows. Explore our room lighting guide for specific fixture recommendations that address these needs gracefully.
-
Daylight integration is one of the most powerful tools available. A south-facing living room with large windows may need zero ambient artificial lighting on a clear afternoon. Factor daylight into your assessment by noting how much natural light enters your space at different times of day, and size your artificial system to supplement rather than duplicate it. This also has significant energy-saving benefits.
Useful DIY tools to run your own assessment:
- Smartphone lux meter apps: While not laboratory-grade accurate, apps like Lux Light Meter Pro for iOS or Lux Meter for Android give you an excellent real-time estimate of light levels, helping you identify dimly lit areas or spots with excessive brightness.
- Online lumen calculator tools: Many websites offer free calculators that handle LLF, CU, and even room index automatically, simplifying the complex math for you. Just plug in your room dimensions and desired lux.
- Paper or digital floorplan sketches: Mapping out your room allows you to visualize fixture placement, identify potential shadows, and plan your lighting zones effectively. Simple sketches can prevent costly mistakes.
- Color temperature sampler cards: Often free from lighting suppliers, these cards show you what various Kelvin temperatures (e.g., 2700K, 3000K, 4000K) actually look like, helping you choose the right "warmth" or "coolness" for different areas.
- Smart bulb starter kits: These allow real-time dimming and color temperature testing directly in your space. You can experiment with different settings to find what feels best before investing in permanent fixtures.
Pro Tip: CRI (color rendering index) matters as much as lux in spaces where you evaluate color, whether you’re cooking, getting dressed, or working on a creative project. Aim for CRI 90+ in kitchens, bathrooms, and studios to ensure colors appear true to life. For living rooms and bedrooms, CRI 80+ at a warm 2700K color temperature creates that enveloping, flattering glow that no cold-white bulb can replicate. High CRI bulbs make everything in your home look better!
The Human Element: What Most Lighting Guides Miss
Most lighting guides stop at the math, hand you a lux table, and wish you well. But the gap between technically correct lighting and genuinely beautiful, livable lighting is wider than any formula can bridge.
The evolving nature of standards makes this especially clear: studies have shown that office environments previously designed to 1000 lux perform just as well, sometimes better, at 500 lux when layering and control are optimized. Standards were revised downward not because we got lazier but because researchers realized that uniformity, glare control, and color quality outweigh raw brightness in human experience. Residential lighting is even more flexible, because a home’s primary job is to feel emotionally right, not just technically sufficient.
We’ve watched homeowners chase lux numbers obsessively, arriving at spaces that feel like well-lit hospital corridors. Technically perfect. Humanly unpleasant. The truth we’ve come to appreciate is that standards are a floor, not a ceiling. They tell you the minimum necessary for safety and task performance. They say absolutely nothing about atmosphere, warmth, or the particular way afternoon light should fall across a beloved piece of furniture. A room can be perfectly bright but feel sterile due to poor color temperature choices or a lack of visual interest from accent lighting.
The most comfortable homes we encounter balance the rigor of a proper assessment with the intuition of a lived-in perspective. They use dimmers not as luxury features but as essential controls. They position accent fixtures to reveal texture in a way that makes a room feel three-dimensional rather than flat. They layer thoughtfully and then adjust by feel rather than formula. This intuitive adjustment, this "feeling it out," is where the art of lighting truly comes alive. It's about listening to your space and your own comfort, not just crunching numbers.
Our perspective: treat the lumen method as your starting point and your personal comfort as the final word. Assessments give you a map. They don’t drive the car. Trust your eyes, your mood, and how a space makes you feel.
Your Personal Lighting Journey Starts Here with Find a Lamp
Once you’ve mapped out your lighting needs through a proper assessment, the genuinely exciting part begins: finding fixtures that are both functionally precise and visually stunning.
At Find a Lamp, our AI-powered platform bridges the space between assessment and acquisition. Forget endless scrolling and guesswork. Upload a photo of your room, and our intelligent system analyzes its layout, finish tones, ceiling height, and existing fixtures. It then cross-references this data with your desired activities and aesthetic preferences to recommend lamps that match your exact functional requirements and design sensibility. Whether you’re searching for playful living room lighting that layers ambient and accent beautifully, or exploring playful bedroom lighting designed to hit that warm 100 to 200 lux sweet spot, our curated collections are organized around the way real rooms work. Visualization tools let you place selected fixtures into your actual space before you commit, turning the guesswork of assessment into a confident, satisfying decision. Discover lighting that doesn't just illuminate, but truly transforms your home.
Frequently asked questions
What tools help homeowners assess room lighting?
Homeowners can leverage several accessible tools for lighting assessment. Floorplans help visualize layouts, while online lumen calculators simplify the math for required brightness. Smartphone lux meter apps offer quick, albeit approximate, measurements of existing light levels. Additionally, investing in smart bulbs for testing purposes, and familiarizing yourself with CRI (Color Rendering Index) values (aim for 80+ for general spaces, 90+ for task areas) and color temperatures (2700K-3000K for warmth, 3500K-4000K for task focus) are crucial for optimal results.
How do I know if my room has enough light?
Beyond comparing your measured lux to recommended benchmarks, pay attention to how your body and eyes feel. Signs of insufficient light include shadowy corners, difficulty performing tasks like reading or cooking, eye strain, headaches, or a general feeling of gloominess. Conversely, too much light can cause glare, discomfort, and a sterile atmosphere. Good lighting should feel comfortable and effortless.
Are professional standards required in homes?
IES residential standards like RP-11-20 offer excellent guidance and are highly recommended for achieving optimal comfort and functionality, but they are not legally mandatory for homeowners. Unlike commercial or workplace environments, residential lighting allows far more flexibility for personal ambiance preferences. The key is to use these standards as a knowledgeable starting point, then adapt them to your unique lifestyle and aesthetic desires.
Does natural daylight affect room lighting assessments?
Yes, significantly! Natural daylight is a powerful and dynamic light source that can drastically reduce your artificial lighting demands during daylight hours. Factoring in window orientation, size, and glazing area makes your calculations far more accurate and efficient. Consider how much natural light enters your space at different times of day and design your artificial lighting to complement and supplement it, rather than compete with it.
What does “uniformity” mean in room lighting?
Uniformity describes how evenly light is distributed across a surface or throughout a space. When light is uniform, there are