Photo-Based AI Lighting Selection: Transform Your Space
Lighting is one of the most transformative decisions you’ll make for your home, yet most of us still rely on guesswork, showroom luck, or the vague hope that what looked brilliant in the store won’t read flat and lifeless once it’s actually installed. That cycle of costly mistakes is finally breaking down. AI-powered, photo-based lighting selection can reduce planning time by up to 60%, turning what used to be an exhausting trial-and-error ordeal into something genuinely exciting. This guide walks you through exactly how the technology works, what to expect at every stage, and how to apply it confidently in your own home.
Table of Contents
- The basics of photo-based lighting selection
- How AI models bring your space to life
- Practical tips for preparing and using your room photos
- Advanced features: simulating, iterating, and personalizing
- Why most people underestimate the power of photo-based lighting AI
- Personalize your home lighting with Find a Lamp
- Frequently asked questions
Key Takeaways
| Point | Details |
|---|---|
| AI analyzes your real space | Upload a photo and the technology suggests lighting based on your actual room’s features. |
| Customization is simple | You can adjust style, color, and mood settings to see how different options will look—before buying. |
| Best results need great photos | Well-lit, straight-on, clutter-free photos lead to the most accurate and inspiring suggestions. |
| Advanced features simulate real changes | Preview lighting from dawn to dusk, switch fixtures instantly, and reduce costly mistakes. |
| Anyone can design like a pro | Photo-based AI lighting makes high-quality interior planning accessible to all homeowners. |
The basics of photo-based lighting selection
Now that you understand why traditional lighting selection can be such a challenge, let’s see how AI redefines the process with photo-based solutions.
Photo-based lighting selection is exactly what it sounds like: you upload a photograph of your room, and an AI system analyzes it to recommend, simulate, and even visualize new lighting options tailored to that specific space. But the mechanics run far deeper than a simple filter. Interior design from photos works by using computer vision to analyze room layout, natural light sources, direction, intensity, shadows, materials, and dimensions, then generates suggestions or fully rendered images with new lighting setups, styles, and fixtures. It’s like handing your room to a seasoned lighting designer who never sleeps and never makes assumptions.
Understanding why lighting analysis matters for every room starts with what the AI actually scans. Here’s the full picture of what a modern system reads from a single image:
- Room layout and proportions (ceiling height, open-plan vs. defined zones)
- Window placement and natural light direction
- Shadow intensity and distribution across surfaces
- Material finishes (matte, gloss, wood grain, stone) and how they reflect light
- Existing fixture positions and their current contribution to the scene
- Color palette and how different light temperatures will shift those tones
That level of detail means the AI isn’t giving you a generic suggestion. It’s giving you something genuinely responsive to your home’s architecture and your personal style.
Traditional vs. AI-driven selection: a direct comparison
| Factor | Traditional method | AI-driven method |
|---|---|---|
| Time to first suggestion | Days to weeks | Minutes |
| Error rate (wrong scale, wrong tone) | High | Significantly reduced |
| Ability to iterate quickly | Limited | Unlimited renders |
| Personalization to your room | Minimal | Highly specific |
| Visualization before purchase | Impossible | Instant preview |
| Cost of mistakes | High (returns, restocking) | Negligible |
The difference is not incremental. It’s generational. Homeowners who have experienced both approaches rarely go back.
How AI models bring your space to life
With the foundation set, let’s break down what actually happens after you upload that snapshot of your space.

The process feels almost magical the first time you see it, but the underlying logic is systematic and sophisticated. Modern platforms use image-to-image AI interior design tools, including models like Seedream 4, that preserve the geometry, shadows, and reflections of your original photo while swapping in entirely new lighting configurations. Text prompts refine the results, think “warm ambient with layered accent lighting” or “cool, north-facing studio setup,” and preset styles like golden hour, candlelit, or daylight simulation give you ready-made moods to explore. The geometry stays intact; only the light transforms.
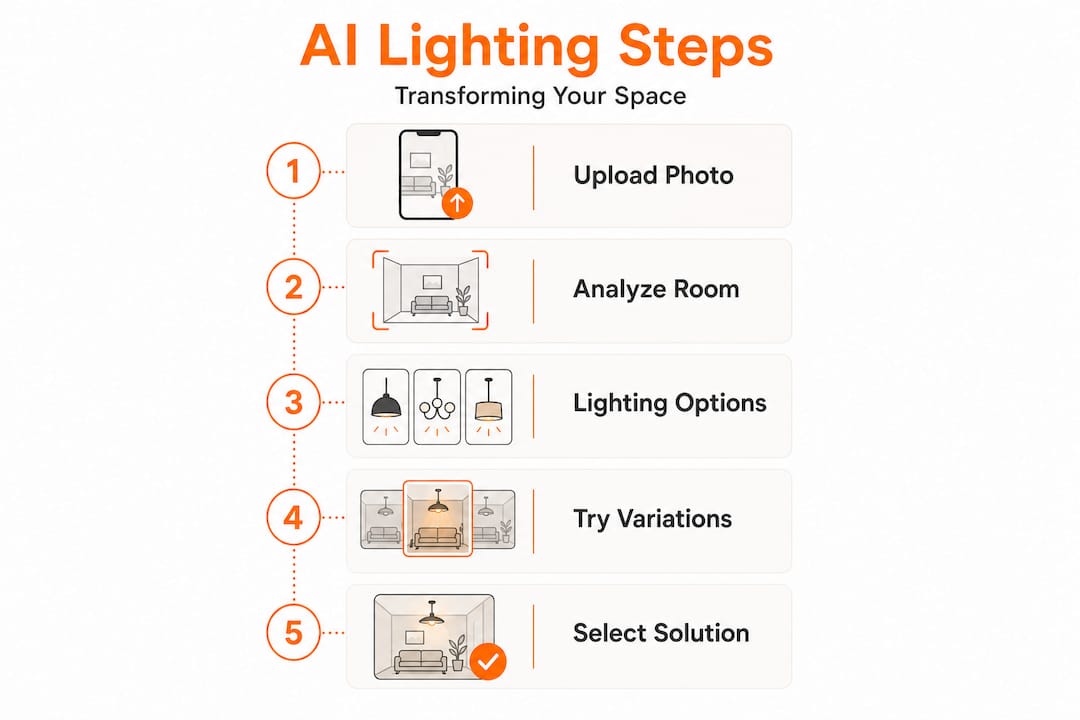
Here’s how the full process unfolds, step by step:
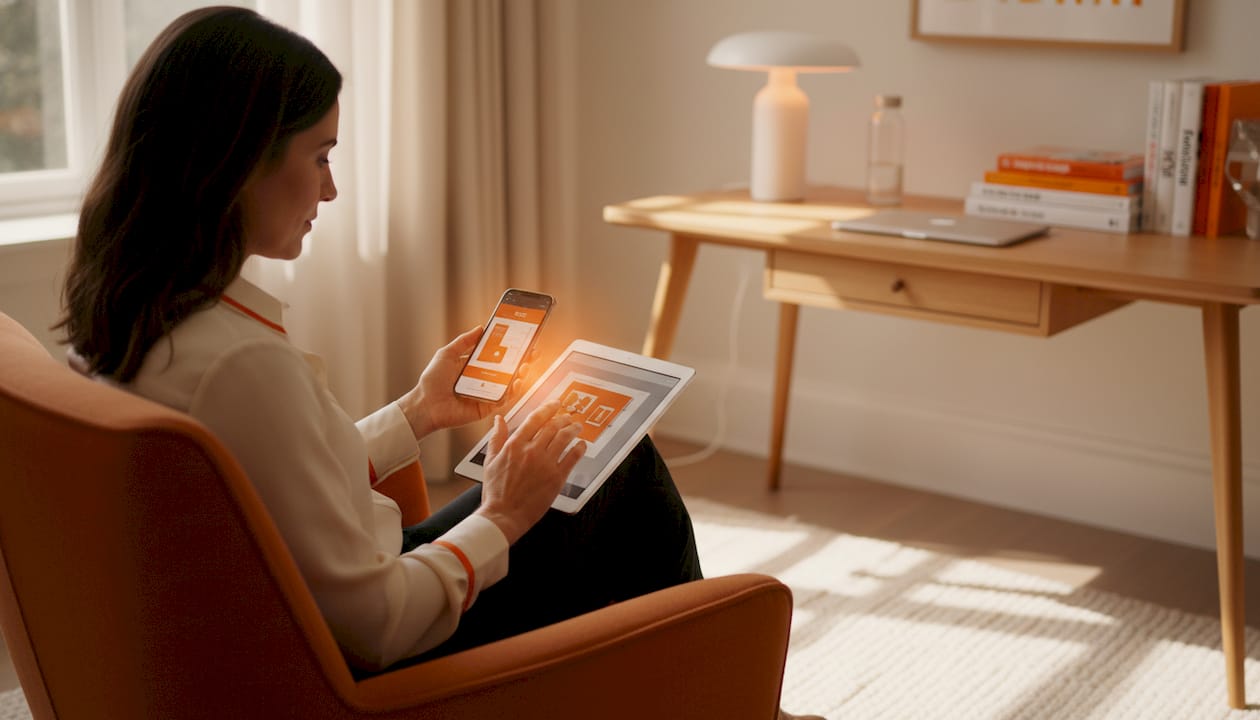
- Upload your room photo. A clear, daylight image gives the model the richest dataset to work from.
- AI analyzes spatial geometry. The model maps walls, ceiling height, furniture positions, and window openings.
- Lighting characteristics are preserved and reconstructed. Shadows and reflections from your current setup are cataloged, forming a baseline.
- You select a style prompt or preset. This is where personalization begins, whether you want a cozy Scandi warmth or a sharp, gallery-quality cool white.
- The system generates a rendered preview. The result shows your actual room with the new lighting applied, in photorealistic detail.
- You iterate. Adjust the color temperature, swap the fixture style, shift from ambient to accent-heavy, and regenerate until it clicks.
“The shift from imagining a lighting setup to actually seeing it rendered into your living room in seconds is the kind of leap that changes how people relate to their own spaces. It’s not just convenience. It’s creative freedom at a level that was previously reserved for professionals with expensive visualization software.”
That iterative loop is where the real magic lives. Most people treat their first render as a final result. The real power of personalized lighting solutions comes from treating that first render as a starting point, not a destination.
Pro Tip: Don’t commit to your first AI render. Generate at least three variations, one cooler, one warmer, one with layered accent lighting, before forming an opinion. The contrast between versions often reveals a preference you didn’t know you had.
Practical tips for preparing and using your room photos
To make the most of AI-powered lighting tools, it helps to start with the right kind of photo. Here’s how.
The quality of your input directly determines the quality of your output. This isn’t a technology limitation so much as a physics limitation: the AI can only work with the information it’s given. AI relighting limitations are well-documented, and they tend to cluster around the same culprits: poor input photos with extreme lighting (deep shadows, blown highlights), low resolution, or clutter that confuses the model’s spatial mapping. North or south-facing exposures also affect how accurately the system simulates natural light at different times of day.
Here’s what a great input photo looks like:
- Shot in natural daylight, ideally overcast (no harsh direct sun creating extreme contrast)
- Taken straight-on, not from a dramatic angle that distorts proportions
- Clutter-free, so the AI can cleanly identify surfaces, furniture edges, and open areas
- Well-exposed, meaning no areas of the image are pure white (blown highlights) or completely black (crushed shadows)
- High resolution, which preserves material detail the AI uses for reflection modeling
Beyond the photo itself, what you tell the system matters enormously. Providing context, such as the room’s purpose (home office, reading nook, formal dining), your preferred aesthetic (industrial, warm Japandi, maximalist Art Deco), and even a rough budget range, pushes the AI from generic recommendations to truly tailored ones.
Also pay close attention to lighting analysis for accuracy when you’re dealing with rooms that have unusual proportions or mixed light sources. A long, narrow hallway behaves very differently from a wide open-plan kitchen, and the AI needs a photo that honestly represents that geometry.
Pro Tip: Take a series of photos throughout the day to capture how light shifts from morning through evening in your specific room. Upload each one separately and compare the AI’s recommendations. Rooms that feel warm and golden at noon can read totally differently under overcast afternoon light, and that contrast can help you discover your ideal artificial lighting setup.
Advanced features: simulating, iterating, and personalizing
With the basics and best practices covered, let’s see how advanced features let you truly personalize your space before you buy a single light.
This is where photo-based AI stops being a novelty and starts behaving like a serious design tool. Modern platforms now simulate lighting temperatures across the 2700K to 3000K warm range (ideal for kitchens, where cooler lights can make food look unappealing), construct layered lighting plans that combine key, fill, and accent sources, and generate previews accurate enough to catch common scale errors, like pendant lights hung too high or floor lamps that visually overwhelm a compact corner.
According to AI rendering research, specific prompts improve detail retention in 89% of cases compared to just 61% for global adjustments. That’s a significant gap, and it underlines why learning to write effective prompts is worth the ten minutes it takes. Instead of typing “better lighting,” try “warm 2800K pendant over dining table with soft fill light on the east wall.” The specificity pays off in the render.
Here’s a practical example of the refinement process, walking through a pendant light selection for a kitchen island:
- Start with a baseline render. Upload your kitchen photo with a neutral daylight prompt.
- Select a pendant style. Choose a rattan globe, a matte black industrial cage, or an amber glass dome. See each option rendered in your actual space via the artistic living room lighting catalog and similar curated collections.
- Set your color temperature. Try 2700K (amber, intimate) vs. 3000K (clean, food-flattering). Compare side by side.
- Simulate time of day. Check how the setup reads in morning light, afternoon, and after sunset with artificial light only.
- Iterate on layering. Add under-cabinet accent lighting in the render to see how it interacts with the pendant’s downward wash.
- Finalize and shop. The fixture you’ve now seen hanging in your own kitchen, at your exact ceiling height, over your actual countertop material, is not a guess. It’s a decision.
Basic vs. advanced tool comparison
| Feature | Basic AI tool | Advanced AI tool |
|---|---|---|
| Lighting mood simulation | Limited presets | Full day-to-night range |
| Fixture-specific rendering | Generic shapes | Accurate fixture models |
| Color temperature adjustment | Coarse (warm/cool) | Precise (2700K to 6500K) |
| Layered lighting plans | Not available | Key, fill, and accent layers |
| Scale accuracy | Approximate | Calibrated to room dimensions |
| Iteration speed | One render at a time | Real-time or rapid batch |
The previews you generate aren’t just pretty images. They’re functional decision-support tools that directly reduce the risk of expensive, disappointing purchases.
Why most people underestimate the power of photo-based lighting AI
After mastering the application and advanced features, it’s worth reflecting on the deeper transformation this technology brings to decorating.
Here’s a perspective that most lighting articles won’t offer: the real barrier to better home lighting has never been budget or access. It’s been imagination. Most homeowners design their lighting plans around what they can already picture, which is almost always a variation of what they already have. Store displays, Pinterest boards, and manufacturer catalogs all have the same limitation: none of them show your room.
Photo-based AI breaks that ceiling. The moment you see your actual living room rendered with a dramatic layered lighting plan you would never have considered, something shifts. You stop thinking in increments (“maybe a slightly brighter bulb”) and start thinking architecturally (“maybe I need three light sources at different heights to make this space feel the way I want it to”).
Tools that enable photo-based redesigns, preserving realism for personalized solutions that previously required professional designers, have genuinely democratized something that felt exclusive for decades. The family renovating a 1970s ranch house and the interior designer speccing a luxury penthouse are now working with comparable levels of visual intelligence. That is a remarkable shift.
What we find most compelling is that iterative experimentation consistently leads to bolder outcomes. Homeowners who use these tools more than once tend to push further with each session, requesting more dramatic contrast, more daring fixture choices, more creative layering. The technology doesn’t just validate safe choices. It quietly expands what people believe is possible for their space. Exploring AI-powered redesign insights is where we encourage every reader to start, because seeing what others have discovered often sparks ideas you wouldn’t arrive at on your own.
Personalize your home lighting with Find a Lamp
Feeling inspired by what’s possible? Bring your vision to life with just a photo, and here’s how to get started.
At Find a Lamp, we’ve built our entire platform around the conviction that lighting selection should feel personal, precise, and genuinely exciting. Upload a photo of your room and our AI instantly analyzes your space, your existing style, and your layout to deliver recommendations that actually fit.
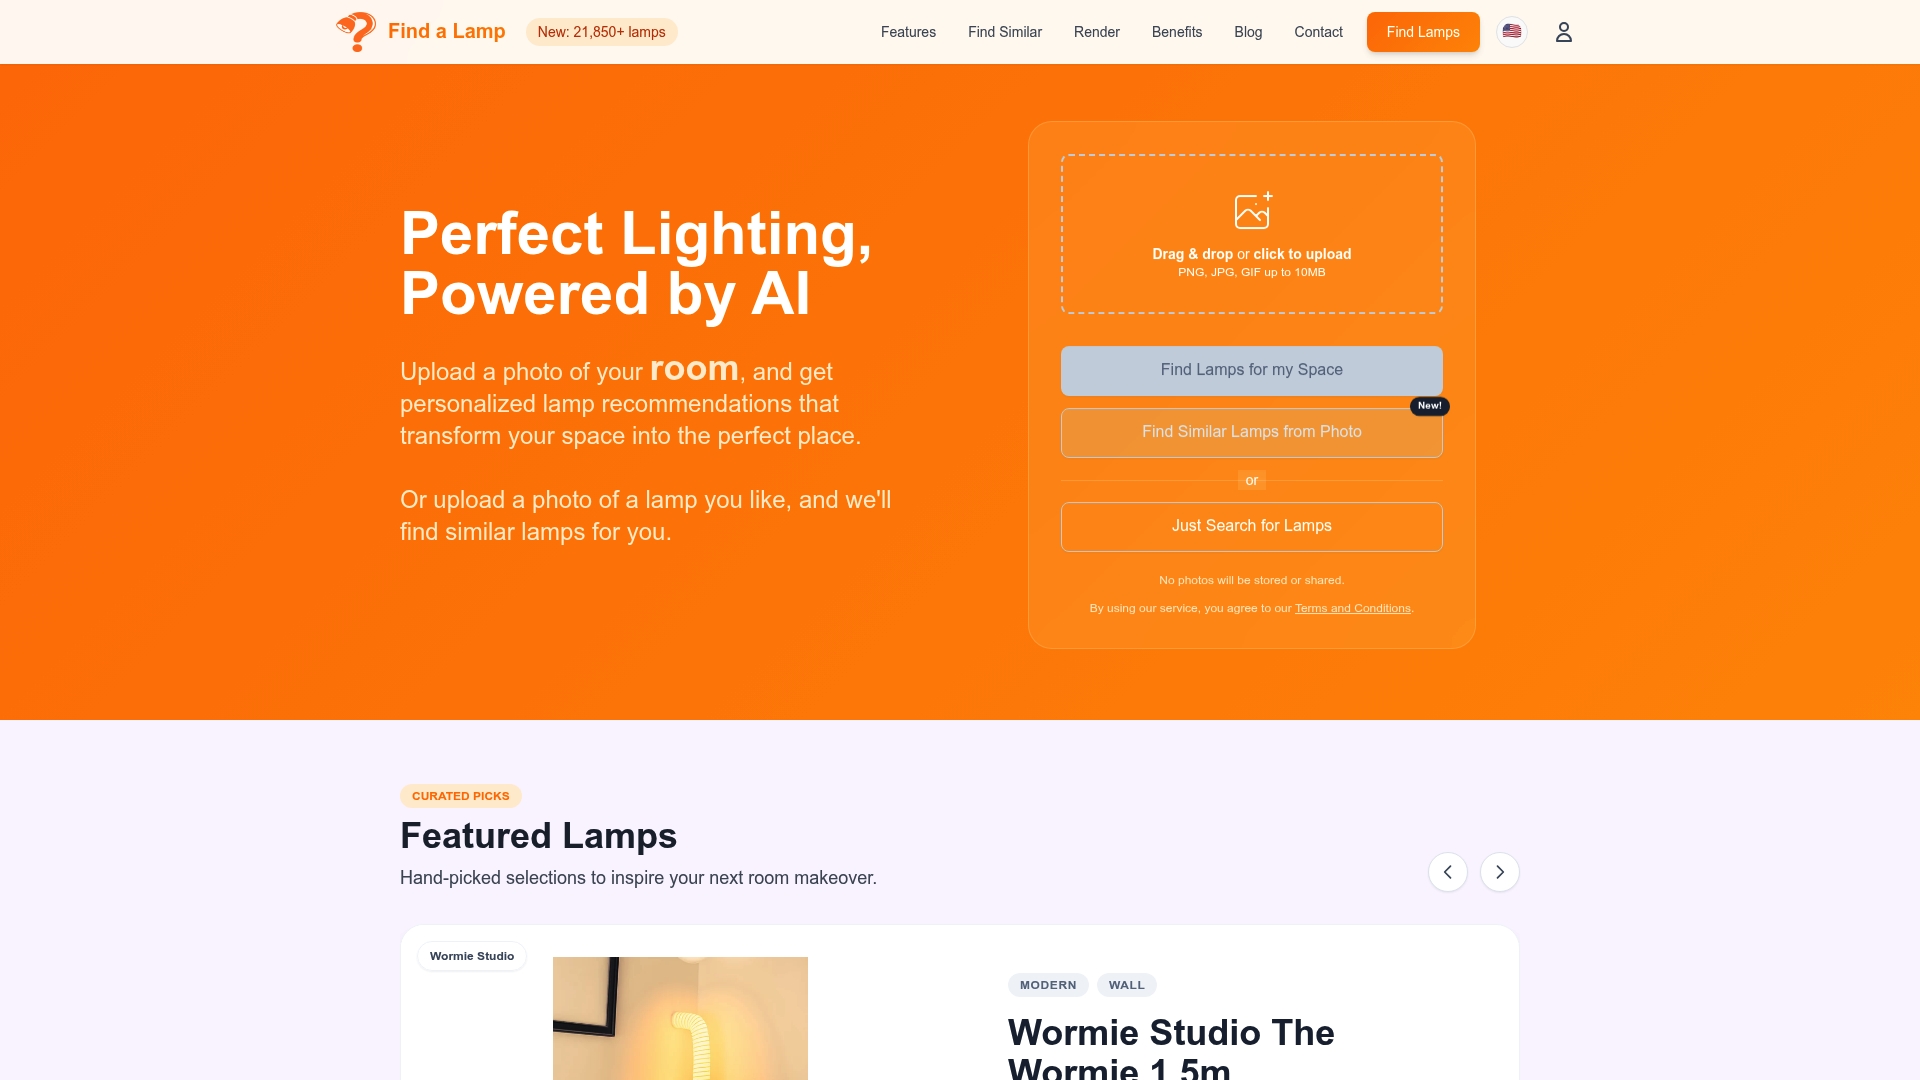
Whether you’re searching for living room lamps that anchor a statement seating area or exploring our collection of vintage and retro lamps for something with warmth and character, our curated catalog spans every aesthetic from industrial raw to soft organic. Every product comes with our visual search tool, so you can upload a fixture you love and find something beautifully similar. Stop guessing. Start seeing.
Frequently asked questions
What is photo-based lighting selection in home design?
It’s an AI-powered process where you upload a room photo and the system analyzes layout, natural light, shadows, materials, and dimensions to suggest or visualize optimal lighting options tailored specifically to your space.
How accurate are AI-generated lighting previews?
Accuracy is high with clear, natural-light photos and specific input prompts, but poor photos with extreme lighting or clutter can meaningfully reduce the quality of results.
Can I simulate different times of day or lighting moods?
Yes, modern platforms use image-to-image AI models with presets and text prompts that let you explore golden hour, studio lighting, warm ambient, and other time-of-day moods before finalizing your plan.
What are the most common mistakes when using photo-based lighting selection?
Most errors come from using dark, blurry images, skipping room context details, or treating the first render as final. Well-lit, straight-on room photos with detailed style and purpose input consistently produce far better outcomes.
Does AI suggest creative fixtures or just technical options?
Many platforms now recommend both functional and expressive fixtures, integrating instant lighting-inclusive redesigns that blend technical accuracy with genuine aesthetic creativity, giving you options a standard catalog search would never surface.