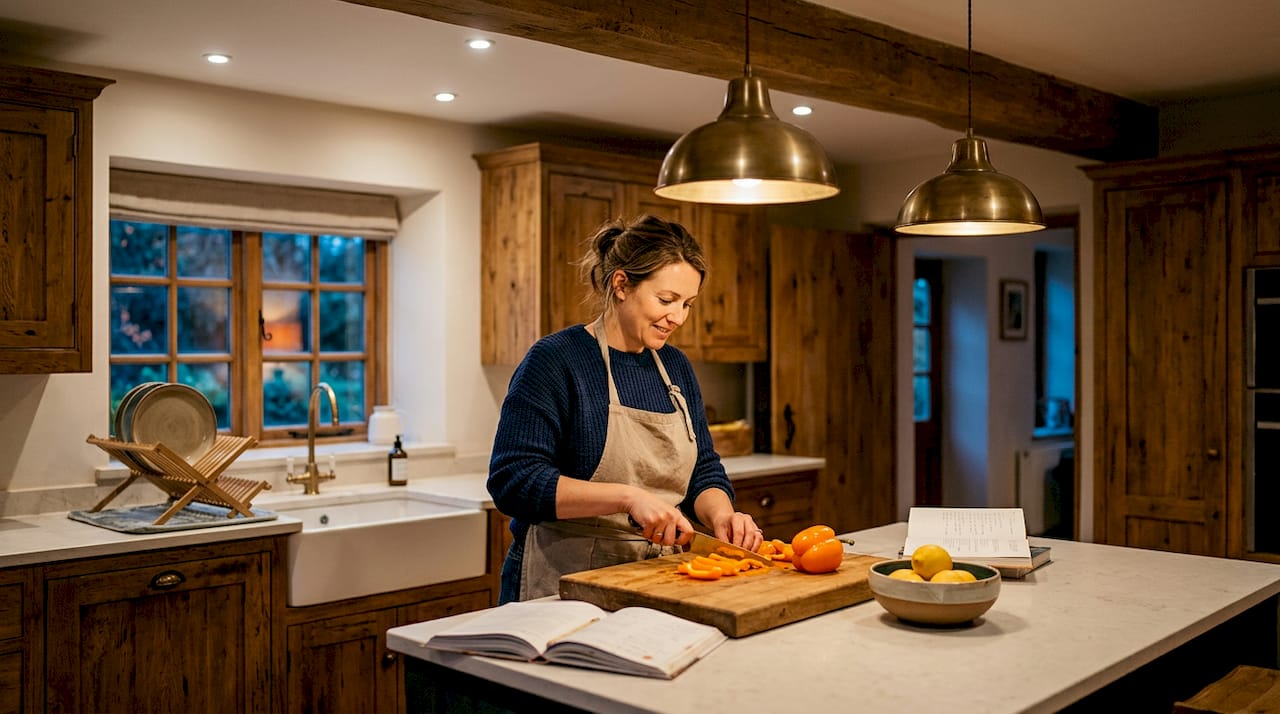
Ever walked into a kitchen that just felt *right*? Where every corner was bright, every task was easy, and the vibe shifted effortlessly from bustling morning prep to cozy evening meals? Chances are, it wasn't just the cabinets or the countertops making magic – it was the lighting. Poor kitchen lighting is one of those subtle saboteurs you feel before you can name it. Shadows fall across your cutting board, the space feels smaller and flatter than it is, and no amount of fresh paint seems to fix the dullness. But here's the secret: transforming your kitchen's ambiance and functionality is simpler than you think, starting with a brilliant lighting plan.
This comprehensive guide cuts through the confusion, addressing the common pitfalls most homeowners encounter: picking the wrong light type for the job, skipping the planning phase entirely, and treating decorative fixtures as the whole solution. We’re diving deep into lumen targets, the power of layered lighting, smart fixture types, clever layout rules, and the installation nuances that trip up even experienced DIYers. Get ready to illuminate your kitchen like a pro!
Table of Contents
- Key Takeaways for a Brighter Kitchen
- Your Kitchen Lighting Selection Guide: Know the Basics First
- Planning Your Kitchen Lighting Layout: The Blueprint for Brilliance
- Choosing Fixtures and Bulbs the Smart Way: Style Meets Substance
- Smart Lighting and Controls: The Future is Now
- Installation Tips and Mistakes to Sidestep: Smooth Sailing Ahead
- My Take on What Actually Transforms a Kitchen
- See Your Kitchen Lighting Come Together with Findalamp
- FAQ
Key Takeaways for a Brighter Kitchen
| Point | Details |
|---|---|
| Layer Your Lighting | Combine ambient, task, accent, and decorative fixtures for full coverage, mood control, and visual depth. |
| Hit Your Lumen Targets | Aim for 50 to 75 lumens per square foot for ambient light, and a focused 1,500 to 2,000 lumens per task fixture for critical work zones. |
| Plan Before You Purchase | Create a detailed lighting plan, including fixture placement, wiring routes, and switch locations, *before* buying anything. |
| Match Dimmers to LEDs | Always verify LED compatibility on every dimmer switch to prevent frustrating flickering, buzzing, or premature bulb failure. |
| Position Recessed Lights Precisely | Place recessed fixtures 18 to 24 inches from wall cabinets to ensure light hits countertops directly, eliminating annoying shadows. |
| Prioritize CRI & Kelvin | Choose bulbs with a Color Rendering Index (CRI) of 90+ and a color temperature (Kelvin) between 3000K-4000K for accurate food colors and comfortable ambiance. |
Your Kitchen Lighting Selection Guide: Know the Basics First
Before you fall head over heels for a stunning pendant fixture, you need to understand the fundamental requirements of your kitchen in terms of raw light output and color quality. These two factors are the non-negotiable foundation that shapes every design decision that follows. Think of it as the science behind the sparkle!
How Much Light Does Your Kitchen Actually Need? Lumens & Lux Explained
Let's talk numbers. General ambient lighting for a kitchen should deliver 50 to 75 lumens per square foot. This means if you have a cozy 150-square-foot kitchen, you're looking at needing between 7,500 and 11,250 total lumens spread across all your general illumination fixtures. This isn't just about brightness; it's about creating a comfortable, evenly lit foundation for your space.
But kitchens aren't just for ambient glow. They're bustling workshops! Task lighting over critical work zones like countertops, islands, stovetops, and sinks demands considerably more focused light. We're talking 1,500 to 2,000 lumens *per task fixture*. These aren't decorating preferences; they are functional thresholds designed to prevent eye strain, enhance safety, and make cooking a joy, not a chore. Without adequate task lighting, you'll find yourself constantly battling shadows, no matter how bright your overhead lights are.
Color Temperature: Setting the Mood and Enhancing Clarity (Kelvin)
Beyond brightness, the *color* of your light dramatically impacts your kitchen's feel and functionality. Measured in Kelvin (K), color temperature dictates whether your light feels warm and inviting or cool and crisp. The recommended kitchen range sits comfortably between 3000K and 4000K. Here's why:
- 3000K (Warm White): This warmer tone is perfect for traditional or farmhouse kitchens, or for those who prefer a cozier, more inviting evening ambiance. It mimics the soft glow of incandescent bulbs, making your kitchen feel like a comforting retreat.
- 3500K-4000K (Neutral to Cool White): These cooler tones significantly improve visual clarity, making them ideal for modern kitchens or spaces where demanding prep work is a daily routine. They provide excellent color rendition, making it easier to distinguish ingredients and assess food doneness accurately. Think vibrant greens and reds!
Pro Tip: Avoid anything above 5000K unless you're aiming for the stark, clinical ambiance of a hospital corridor. While seemingly "brighter," these cool temperatures can be harsh, unflattering, and make your kitchen feel less like a home and more like a laboratory.
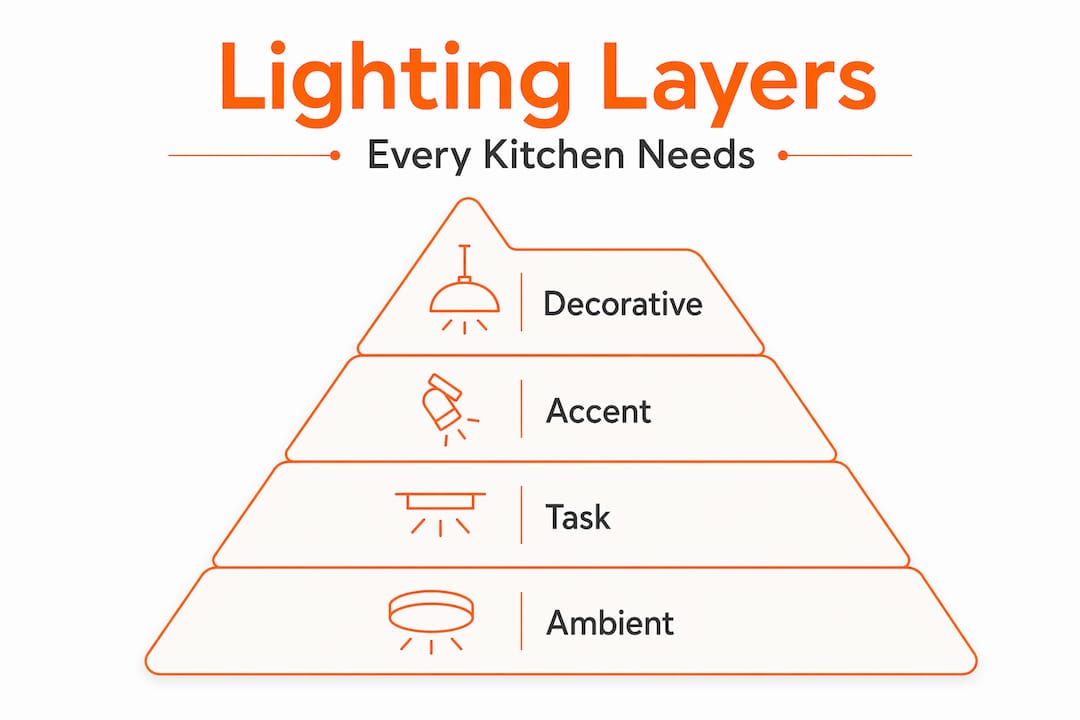
The Four Lighting Layers Every Kitchen Needs: A Symphony of Light
Here's where most homeowners get stuck, thinking one great overhead fixture covers everything. It absolutely does not. Effective kitchen lighting operates in a beautiful, dynamic symphony of four distinct layers, each playing a crucial role in the room's overall functionality and aesthetic.
- Ambient Lighting: The Foundation. This layer provides the base illumination that fills the entire room, ensuring you can navigate safely and comfortably. Recessed downlights, flush-mount fixtures, or even strategically placed track lighting typically handle this role. It's the general wash of light that prevents your kitchen from feeling like a cave.
- Task Lighting: The Workhorse. This is the focused light that targets specific work zones: countertops, islands, stovetops, and sinks. Think under-cabinet strips, focused pendants over an island, or dedicated range hood lights. Task lighting is paramount for safety and efficiency, ensuring your knife cuts are precise and your recipes are legible without straining your eyes.
- Accent Lighting: The Drama Creator. Purely about visual depth and atmosphere, accent lighting draws attention to architectural details, open shelving, a stunning tile backsplash, or even artwork. It's often achieved with LED tape lights, small directional spots, or in-cabinet lighting. This layer adds dimension and highlights the beautiful elements of your kitchen, making it feel more curated and sophisticated.
- Decorative Lighting: The Personality. This is where your kitchen's unique style shines! Chandeliers, statement pendants, and sculptural sconces live in this layer. They add character, visual interest, and a touch of glamour. However, a crucial rule of thumb: decorative fixtures should *never* be relied upon to carry the functional load alone. They are the jewelry, not the backbone, of your lighting scheme.
Designers consistently emphasize that no single fixture type covers all of these needs. A thoughtful, layered approach is what truly separates a kitchen that merely looks good from one that actually works beautifully and feels incredible, day in and day out.
| Lighting Layer | Primary Purpose | Common Fixture Type | Impact on Kitchen |
|---|---|---|---|
| Ambient | General illumination, safety | Recessed downlights, flush-mount, track lights | Overall brightness, prevents dark spots |
| Task | Focused light for work zones | Under-cabinet strips, pendants, track heads, range hood lights | Reduces eye strain, enhances safety & precision |
| Accent | Visual drama, highlights features | LED tape, directional spots, in-cabinet lighting | Adds depth, showcases design elements |
| Decorative | Style, personality, aesthetic appeal | Chandeliers, sculptural pendants, sconces | Adds character, focal points, visual interest |
Planning Your Kitchen Lighting Layout: The Blueprint for Brilliance
Getting the lumen math right is step one. Knowing *where* to physically place those fixtures – and why – is where the real craft begins. A well-executed layout eliminates dead zones, banishes annoying shadows, and makes your kitchen feel coherent, functional, and inviting rather than a collection of random lights.

Zone Your Kitchen Before You Zone Anything Else
Forget thinking of your kitchen as one big room. Instead, envision it as a collection of distinct activity zones, each with its own lighting needs and personality. This approach simplifies the planning process immensely:
- The Cooking Zone: Range, cooktop, oven. Needs bright, focused, shadow-free light for safety and precision.
- The Prep Zone: Countertops, often adjacent to the sink. Requires robust task lighting to make chopping, mixing, and reading recipes easy.
- The Cleaning Zone: Sink and dishwasher area. Needs bright, clear light to spot grime and ensure dishes are sparkling.
- The Island/Peninsula Zone: Often a multi-functional space for prep, dining, or gathering. Can benefit from a mix of focused task lighting and decorative elements.
- The Dining Zone: If you have an eat-in kitchen, this area requires softer, more ambient light for comfortable meals.
Treat each zone separately from the start, and your kitchen lighting checklist becomes much more intuitive and effective.
Spacing and Placement Rules That Actually Work
These aren't just suggestions; they're the golden rules for effective kitchen lighting. Follow this numbered approach for placing recessed fixtures and other key lights:
- Ambient Recessed Light Spacing: Divide your ceiling height by two to get your *maximum* fixture spacing. For instance, an 8-foot ceiling means fixtures should be no more than 4 feet apart. This ensures even general illumination without dark spots.
- Recessed Lights & Wall Cabinets: Position recessed fixtures 18 to 24 inches from the front edge of wall cabinets. This crucial placement projects light onto countertops rather than into the cabinet faces, effectively eliminating those frustrating shadows that plague your prep work.
- Island Pendant Placement: For optimal coverage and aesthetics, space island pendants 24 to 30 inches apart (center to center). Also, keep them 6 to 12 inches from the island ends so the light distributes evenly without clustering or leaving the ends dim.
- Under-Cabinet Lights: Install under-cabinet lights toward the *front edge* of the cabinet, not the back. Front placement pushes light down onto the work surface, where it's needed, rather than merely illuminating the backsplash.
- Sink Lighting: If you have a window over your sink, consider a recessed light directly overhead, or a small, attractive flush-mount fixture. This provides necessary task lighting without interfering with the window treatment.
- Plan for Zone-Specific Dimmer Switches: This is a game-changer! Separate controls for ambient, task, and accent circuits give you the ultimate flexibility to shift from bright, energetic prep mode to a relaxed, intimate dinner ambiance without rewiring anything.
Pro Tip: When planning pendant placement over an island, use painter’s tape on the ceiling to mark your proposed fixture positions. For a more immersive experience, hang balloons or paper cutouts at the intended heights. Live with the markings for a day or two and observe how natural light interacts with those spots throughout the day. You may find your initial plan needs adjusting, saving you costly mistakes!
Remember, a single central ceiling fixture creates flat, uninspiring light and harsh shadows across the entire kitchen. Embrace the power of multiple, individually controlled light sources.
Safety Considerations Worth Knowing Upfront
Don't skip these critical safety specs on your home lighting checklist:
- IC-Rated Housings: For recessed fixtures installed near insulation (like in an attic above your kitchen ceiling), always choose "IC-rated" (Insulated Contact) housings. Non-IC rated fixtures require clearance from insulation and can pose a fire risk if not properly installed.
- Wet/Damp-Location Ratings: Fixtures directly above sinks, stovetops, or other areas prone to moisture should have a "wet-location" or "damp-location" rating. This ensures they are designed to withstand splashes and humidity without short-circuiting or becoming a hazard.
These aren't optional upgrades. Skipping them creates fire risks, electrical hazards, and potential code violations that can surface during home inspections at the worst possible moment.
Choosing Fixtures and Bulbs the Smart Way: Style Meets Substance
Now comes the part most people want to start with! Fixture selection is genuinely exciting, but it earns its full potential only when the meticulous planning work we just discussed is already done. Here's how to make the right calls, ensuring your chosen lights are both beautiful and supremely functional.
Matching Beam Angle and Lumen Output to Each Zone
Think of beam angle as the spread of light. It's crucial for directing light exactly where you need it:
- Wide Beam (90-120 degrees): Recessed fixtures for ambient lighting typically use a wide beam spread to wash the room broadly and evenly. This creates that comfortable base layer of illumination.
- Narrow Beam (30-60 degrees): Task-oriented fixtures, including track heads aimed at counters, work best with a narrower beam. This concentrates light precisely where the knife meets the cutting board, providing intense, focused illumination without spillover or glare. Choosing a wide-beam fixture for task lighting is a surprisingly common mistake that produces glare without useful illumination.
Selecting CRI for Real-World Kitchen Performance: See Your Food in True Color
Color Rendering Index (CRI) measures how accurately a light source reveals the true color of objects compared to natural daylight. For kitchens, where food presentation and assessment are key, prioritize fixtures with a CRI of 90 or above. Lower CRI values (anything below 80) can make fresh produce look dull, meats appear unappetizing, and even make it harder to assess whether something is properly cooked. This matters more than most people realize until they notice their vibrant basil looking sickly under poor light!
- Choose bulbs and fixtures rated CRI 90 or higher for all prep and cooking zones to ensure accurate color representation of food.
- Use 3000K to 3500K for a warm, inviting feel that still supports excellent food visibility.
- Reserve 4000K for modern, minimalist kitchens where clinical clarity and a crisp aesthetic are part of the design intent.
- Confirm LED dimmer compatibility before installing. Standard incandescent dimmers often cause LED flickering, buzzing, or abrupt shutoffs. Always check the dimmer’s LED rating and the bulb manufacturer’s compatibility list.
Pro Tip: When choosing kitchen lighting options like pendants over an island, verify the fixture’s listed mounting height. Most pendants perform best hung 30 to 36 inches above the island surface. Too high and the focused beam loses intensity; too low and you create uncomfortable glare for anyone seated or working there, obstructing views and conversation.
Styling your fixtures to complement your kitchen's aesthetic is the enjoyable part of choosing kitchen lighting, and it absolutely should come last. Once you've confirmed lumen output, color temperature, CRI, and dimmer compatibility, you've earned the freedom to pick the finish, material, and form that excites you. You can explore how lighting shapes design to connect your fixture choices with your kitchen’s broader aesthetic before committing.
Smart Lighting and Controls: The Future is Now
Embrace the power of smart lighting to elevate your kitchen's functionality and ambiance to a whole new level. Modern technology offers incredible flexibility:
- Smart Dimmers & Switches: Control your lights from your phone, voice assistant, or even schedule them to turn on/off automatically. Many smart dimmers offer finer control over LED brightness curves.
- Tunable White LEDs: Some LED fixtures allow you to adjust the color temperature from warm (2700K) to cool (5000K) with a swipe of an app. Imagine shifting from bright 4000K for morning prep to a cozy 3000K for an evening dinner party!
- Motion Sensors: Great for pantries or under-cabinet toe-kick lighting, motion sensors can provide convenient hands-free illumination when you need it most.
- Integration with Smart Home Systems: Connect your kitchen lights with your broader smart home ecosystem for seamless control alongside your thermostat, security, and entertainment systems.
While an initial investment, smart lighting offers unparalleled convenience, energy savings, and personalized control over your kitchen's atmosphere. Explore smart home lighting options to see what fits your lifestyle.
Installation Tips and Mistakes to Sidestep: Smooth Sailing Ahead
The best lighting plan in the world is only as good as its execution. If the installation goes sideways, you're left with frustration, extra costs, and potentially an unsafe setup. These are the practical lessons that save time, money, and those dreaded second trips to the hardware store.
- Mock Up Pendant Placement: As mentioned, suspend balloons or tape paper cutouts at your intended pendant heights and spacing. This visual method reveals scale problems and spacing issues that are nearly impossible to catch on paper alone. It's a cheap, easy way to prevent drilling irreversible holes in the wrong spot.
- Write a Detailed Lighting Plan: Before you purchase a single fixture or even call an electrician, create a comprehensive written plan covering fixture placement, wiring routes, switch locations, and even specific bulb types. This prevents code violations, voltage overload, and the expensive surprises that show up mid-installation.
- Never Rely on a Single Overhead Fixture: This bears repeating. Flat, single-source light produces harsh shadows, poor visibility for tasks, and zero adaptability for different activities. It’s the hallmark of an outdated or poorly lit kitchen.
- Check Total Wattage on Each Circuit: This is a critical safety check. Overloaded circuits are a real risk when you add multiple recessed fixtures or high-wattage pendants to an existing kitchen circuit. Always calculate the total wattage for each circuit you plan to use. When in doubt, consult a licensed electrician before proceeding to avoid tripping breakers or even electrical fires.
- Avoid Incompatible Dimmer Switches: Using incandescent-rated dimmers with LED bulbs is one of the most common errors in DIY kitchen lighting installs. This can lead to flickering, buzzing, reduced bulb lifespan, or even complete failure. Always verify the dimmer’s explicit LED rating and, if possible, check the bulb manufacturer’s compatibility list for specific dimmer models.
- Consider Professional Installation: While some basic fixture swaps can be DIY, complex installations involving new wiring, circuit additions, or multiple recessed lights are best left to a licensed electrician. It ensures safety, adherence to local codes, and a professional finish.
“A written lighting plan with fixture placement, wiring routes, and switch locations should be completed before any fixture purchase. Advance planning prevents code violations, voltage overload, and installation surprises.” — Expert lighting design principle
Good kitchen lighting design tips from professionals consistently point back to the same principle: decisions made on paper cost nothing to revise. Decisions made after drilling and wiring cost significantly more – in both money and regret.
My Take on What Actually Transforms a Kitchen
I’ve worked with enough homeowners on layered lighting strategies to notice a pattern that almost never fails to surprise people: lighting is consistently the first line item cut when kitchen remodel budgets get tight. And it is, almost without fail, the decision people most regret later.
Think about it: the lighting is the one element you interact with, consciously or unconsciously, every single time you enter the room. The countertop doesn't change when you're tired at 6 a.m. trying to read a recipe. The lighting does, or at least, it *should* be able to adapt.
My contrarian take on the decorative lighting obsession? Statement pendants are wonderful, and I genuinely love a sculptural fixture that has “main character energy.” But I've seen too many kitchens where the entire lighting budget went to a gorgeous chandelier that casts dramatic shadows across every work surface. Decorative lighting adds personality and flair, but it should never, ever be the sole source of illumination. If your decorative layer is doing the functional work, you've skipped at least two of the four crucial lighting layers, and your kitchen is suffering for it.
The lesson I keep coming back to: flexibility wins. Dimmers on separate circuits for ambient, task, and accent lighting give a kitchen more design versatility and functional prowess than any single fixture purchase ever will. Plan the infrastructure first. Get the layers right. Then, and only then, let yourself get excited about the finishes and the fixtures. That’s how you build a kitchen that truly shines.
— Raz, Interior Lighting Blogger
See Your Kitchen Lighting Come Together with Findalamp

Feeling overwhelmed by all the choices? Findalamp takes the guesswork out of translating your perfect lighting plan into actual fixtures. Upload a photo of your kitchen, and our AI-powered engine analyzes your room’s style, layout, and existing light sources to generate curated fixture recommendations that match both your aesthetic and your precise lumen requirements. You can browse kitchen and home lighting options sorted by fixture type and style, or use the visual search tool to find fixtures that match inspiration images you already love. For spaces adjacent to your kitchen, like an open-plan living area, our industrial lighting collection offers statement pieces that carry the same bold design language without sacrificing output. See exactly how a pendant or recessed fixture will look in your actual space before you commit to anything – making your dream kitchen lighting a brilliant reality.
FAQ
How many lumens does a kitchen need?
A kitchen generally needs 50 to 75 lumens per square foot for ambient (general) lighting. For example, a 150-square-foot kitchen would need 7,500 to 11,250 total lumens. Additionally, critical task areas like countertops require an extra 1,500 to 2,000 lumens per dedicated task fixture.
What color temperature (Kelvin) is best for kitchen lighting?
The ideal range for kitchen lighting is 3000K to 4000K. Warmer temperatures around 3000K (warm white) are excellent for traditional kitchens and a cozy ambiance. Cooler temperatures between 3500K and 4000K (neutral to cool white) provide superior visual clarity, which is ideal for modern kitchens and detailed food preparation.
How far should recessed lights be from kitchen cabinets?
To effectively illuminate countertops and eliminate shadows, position recessed lights 18 to 24 inches from the front edge of your wall cabinets. Placing them too close to the wall or too far into the room are common mistakes that create ineffective lighting.
Do I need special dimmers for LED kitchen lights?
Yes, absolutely. Standard incandescent dimmer switches are typically incompatible with most LED fixtures and bulbs, leading to flickering, buzzing, or abrupt shutoff. Always purchase dimmers explicitly rated for LED use and verify compatibility with your specific LED bulbs or fixtures to ensure smooth, reliable dimming.
What is the best way to light a kitchen island?
For optimal lighting and aesthetics, hang pendants 30 to 36 inches above the island surface. Space them 24 to 30 inches apart (center to center), and ensure they are positioned 6 to 12 inches from the island ends. Always use a balloon or paper cutout mockup to confirm the scale and spacing before permanent installation.
Why is layered lighting important in a kitchen?
Layered lighting (combining ambient, task, accent, and decorative light) is crucial because it provides flexibility, functionality, and visual depth. A single light source creates harsh shadows and a flat look. Layers allow you to adjust the lighting for different activities, enhance safety, highlight design features, and create varied moods, from bright task-oriented work to relaxed entertaining.