Ever been there? That moment of unboxing a brand-new lamp, genuine excitement bubbling, only for it to deflate into a "nope" as you realize it's all wrong. Too tall, too dim, the shade clashing with your favorite armchair. It's a common, costly, and frustrating experience. But what if you could banish that guesswork forever? What if you could see, truly *see*, how a lamp would look in your exact space, complete with realistic lighting effects, shadow play, and color temperature shifts, all before hitting 'add to cart'?
Good news, design-savvy friend! That future is here, thanks to cutting-edge lamp visualization technology. This isn't just about overlaying a static image; it's about dynamic, interactive simulations that empower you to make lighting choices with confidence. This comprehensive guide will walk you through everything, from understanding the tools to applying expert lighting principles, ensuring your next lamp purchase feels like a stroke of genius, not a shot in the dark.
Decoding Lamp Visualization: Your Essential Tools & Prep
Before you dive into virtually furnishing your home, let's get clear on what modern visualization tools bring to the table. We're talking about two main players: Augmented Reality (AR) apps and AI-powered platforms. AR apps are like magic mirrors, overlaying 3D digital lamp models onto your live camera feed. This means you can literally walk around your room, phone in hand, and watch a virtual pendant hang from your ceiling or a floor lamp stand beside your sofa, appearing as if it's really there. This offers a visceral sense of scale and proportion that a flat product photo simply can't deliver.
AI platforms take it a step further. Beyond just showing you a lamp, they analyze your room's existing style, natural light, color palette, and layout to generate personalized recommendations. Think of it as having a digital interior designer who not only suggests lamps but also helps you visualize them in context. Many of these platforms also incorporate AR capabilities, offering the best of both worlds.
The beauty is that AR apps place 3D lamp models in a live camera view for real-time positioning and lighting simulation, meaning the technology is genuinely interactive rather than just a static image editor. What you see shifts as you move your phone, giving you a visceral sense of scale and proportion that a flat product photo simply cannot deliver.
Pre-Visualization Checklist: Don't Skip These Steps!
To get the most out of these tools, a little prep goes a long way. Think of it as setting the stage for your lighting masterpiece:
- Measure with Precision: Grab that tape measure! Floor-to-ceiling height is crucial for pendants and floor lamps. Wall dimensions matter for sconces. Even the depth of your side table impacts how a table lamp will sit. A pendant hung too low in a nine-foot room reads as oppressive; the same fixture in a twelve-foot space floats elegantly.
- Define Your Lighting Needs: Every lamp serves a purpose. Are you looking to supplement ambient overhead light, create a focused task zone for reading or working, or add dramatic accent lighting to highlight artwork or architectural features? Knowing this clarifies which lamp types (and where) to visualize. Our breakdown of lighting for interior design styles is a useful reference at this stage.
- Check Device Compatibility: Most AR apps are sophisticated. They require modern operating systems like ARKit (iOS 11+) or ARCore (Android 8.0+) to function optimally. Older devices might struggle with accurate surface detection, leading to lamps that float in mid-air or sink through your floor.
- Note Existing Lighting: What bulbs do you already have? Are they dimmable? Knowing your current setup (including natural light sources) helps you visualize how a new lamp will integrate and what kind of bulb you'll need for it. Visualizing a new fixture alongside non-dimmable sources can create a mismatch that no app will flag for you.
A Quick Look at Popular Visualization Tools:
Each tool has its own personality and strengths:
| Tool/Category | Catalog Size | Lighting Simulation | Cross-Brand Support | AR Accuracy |
|---|---|---|---|---|
| IKEA Place | Large (IKEA only) | Basic glow, scale | No | High |
| Houzz "View in My Room" | Very large (Houzz only) | Color filter, scale | Limited | High |
| DecorViz (or similar AI/AR platforms) | Broad (multi-brand) | Shadow, lux, color temp | Yes | Medium-High |
| BEGA AR+ (professional-grade) | Specialized (BEGA) | Professional lux, beam spread | No | Very high |
IKEA Place is fantastic for accessible, everyday lamps and boasts remarkably reliable surface tracking. Houzz excels for inspiration browsing across a vast marketplace. Platforms like DecorViz are your best bet for flexibility, allowing you to cross-shop styles from various brands. And if you're a true lighting enthusiast or professional, tools like BEGA AR+ offer architectural precision, simulating actual lux levels (a measure of light intensity per square meter) before you commit.
Step-by-Step: Mastering AR & AI Lamp Visualization
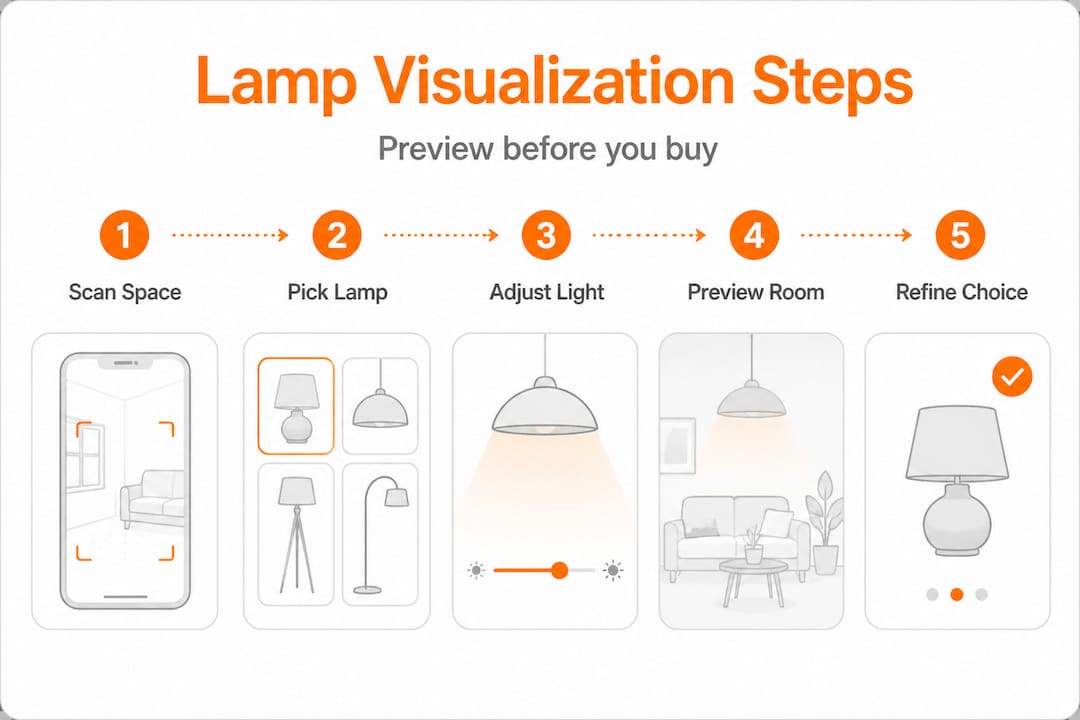
With your room prepped and your chosen app downloaded, it's showtime! Follow these steps to achieve the most realistic and useful visualization results:
-
Scan Your Room Systematically: Open your chosen AR app and begin scanning. Move your phone slowly and steadily, creating overlapping arcs across your floor, walls, and ceiling. Most AR tools need 15 to 30 seconds to build an accurate 3D spatial map of your room. Resist the urge to rush this! A hasty scan often leads to misaligned lamp placement where models appear to float or sink through surfaces.
-
Browse, Import, and Position: Now for the fun part! Select a fixture from the app’s catalog. If your platform supports it, you might even be able to upload a product image of a lamp you love and use AI visual search to find a similar model within the app. Gently drag and drop the virtual lamp into the spot you've envisioned. Step back and observe the overall composition – does it feel balanced?
-
Simulate Light: Brightness & Color Temperature: This is where modern visualization truly shines. The best tools let you toggle brightness levels, offering a glimpse into how the lamp will illuminate your space. Even more critically, they allow you to shift color temperature, usually between warm (around 2700K-3000K for cozy amber tones) and neutral (3500K for crisp, clear light). This matters because AR apps simulate lighting effects alongside positioning, giving you a preview of the actual ambiance, not just the fixture’s silhouette.
-
Adjust Height and Orientation Deliberately: Don't just accept the default placement. A floor lamp tilted slightly can create a dramatic wall wash, while one pointing straight up offers more general illumination. A table lamp, virtually "raised" on a stack of books, might suddenly illuminate a cherished piece of wall art it would otherwise miss. Experiment freely here – even subtle adjustments can dramatically alter a lamp's impact.
-
Capture Screenshots from Multiple Angles: Your perspective matters! What looks perfect from your standing position might cast an awkward shadow or feel overwhelming from your favorite armchair. Move to doorways, seating positions, and entry points, capturing screenshots from each angle. These side-by-side comparisons are invaluable for evaluating options.
-
Cross-Reference with Your Layered Lighting Plan: Before making a final decision, always consult your broader layered lighting strategy. Does this new lamp fill a genuine gap (ambient, task, or accent) or is it redundant? Every lamp should contribute meaningfully to the room's overall illumination. Don't forget to consider choosing lamps bulbs before finalizing any visualization. The bulb’s lumen output and beam angle directly affect how much of your simulation translates into real-world performance.
Pro Tip: When visualizing a table or floor lamp, physically hold your phone at the lamp’s projected shade height and slowly pan around the room. This mimics the actual spread of light far more accurately than viewing the model from your standing eye level.
Expert Lighting Principles for Realistic Visualization
Getting a visually accurate placement is step one. But applying expert lighting principles is what makes that placement *feel* right once the real lamp is installed. This is where many homeowners, relying purely on apps, tend to stumble: they nail the aesthetic but miss the lighting science.
The Power of Layered Lighting
The foundational principle in professional interior lighting design is layered lighting. This means combining different types of light sources to create a versatile, comfortable, and visually appealing space. There are three main layers:
- Ambient Lighting: This is your general, overall illumination – the basic light that fills the room. Think ceiling fixtures, recessed lights, or large floor lamps that bounce light off the ceiling. In your visualization, ensure the ambient layer provides a comfortable base level of light without being harsh.
- Task Lighting: Focused light for specific activities. A desk lamp for reading, under-cabinet lighting for cooking, or a pendant over a dining table. When visualizing, consider the activity in that area and ensure the lamp provides sufficient, glare-free light where needed.
- Accent Lighting: This layer adds drama and highlights specific features like artwork, architectural details, or plants. Picture spotlights, picture lights, or small directional lamps. Use visualization to see how shadows are cast and how specific elements are brought to life.
The industry standard calls for at least two light sources per room, and typically three or more for spaces used across morning, afternoon, and evening hours. This flexibility allows you to adjust the mood and functionality of your room throughout the day.
“Layered lighting with two to three sources per room is the standard approach, and dimmable 2700-3500K warm to neutral white light is the preferred range for residential comfort.”
The Art of Color Temperature (Kelvin Scale)
Color temperature is often overlooked but profoundly impacts a room's mood. Measured in Kelvins (K), it describes the perceived warmth or coolness of white light. Apps that allow you to adjust simulated color temperature are incredibly valuable because yellowy warm light and crisp neutral light transform the same room into two completely different moods.
| Color Temperature | Kelvin Range | Perceived Effect | Best For | Visualization Tip |
|---|---|---|---|---|
| Warm White | 2700K - 3000K | Cozy, inviting, soft glow | Bedrooms, living rooms, dining areas | Simulate at dusk to see the true warm, relaxing effect. |
| Neutral White | 3000K - 3500K | Clean, clear, energetic | Kitchens, home offices, bathrooms | Check against wall paint undertones; avoids yellowing or harshness. |
| Cool White / Daylight | 4000K - 5000K+ | Bright, crisp, stimulating | Garages, utility rooms, task-intensive areas | Can wash out warm-toned furnishings; use sparingly in living spaces. |
For most residential spaces, aiming for the 2700K-3500K band is ideal. This range offers comfort without sacrificing clarity. You can find more detailed information on light color temperature from sources like the Illuminating Engineering Society (IES).

Understanding Lux Values (and Why They Matter)
Lux values measure the intensity of light hitting a surface. While consumer apps may not always display real-time lux, understanding the concept helps you interpret your visualizations. A reading nook needs roughly 300 to 500 lux at the book’s surface for comfortable reading. A dining table looks best at 150 to 300 lux for an intimate atmosphere. If your app doesn't show lux, think about the *purpose* of the light and mentally gauge if the simulated brightness feels adequate.
Common Visualization Mistakes to Sidestep:
- Under-lighting Corners: Unlit corners make a room feel smaller and unwelcoming. Always check the brightness of all corners in your screenshots.
- Color Temperature Clashes: Mixing a 2700K lamp next to a 4000K overhead fixture creates visual dissonance that your eye will register as "something feels off." Strive for consistency within a single room.
- Oversizing Pendants: Scale is notoriously hard to judge on screen. Always double-check fixture dimensions against your actual ceiling height and furniture below. A good rule of thumb for dining pendants is that the diameter should be about half the width of your table.
- Ignoring the "Off" State: Visualize the lamp with the light off, too. A beautiful shade might become an ugly silhouette or block a view when unlit, undermining the room’s daytime aesthetic.
Browsing modern dimmable floor lamps alongside your simulated layouts is a smart way to identify fixtures that offer the flexibility to shift between ambient and accent roles as the day progresses. And always loop back to your broader layered lighting guide to confirm each visualization supports the full lighting ecosystem of the room.
Troubleshooting & Optimizing Your Virtual Lamp Choices
Even with the best tools and principles, sometimes visualizations throw a curveball. The lamp looks perfect in the app, but something still feels off. Or you can't find the exact model you want in any AR catalog. These friction points are common, and there are clear strategies for navigating them.
Overcoming Common Visualization Hurdles:
- Alignment Errors (Floating/Sinking Lamps): This is almost always due to poor surface detection. Re-scan the floor and surrounding surfaces slowly and thoroughly before placing the model. Bright, uneven ambient light or highly patterned rugs can sometimes confuse AR tracking algorithms. Try adjusting your room's lighting or moving the furniture slightly if the problem persists.
- Color Rendering Mismatches: AR simulations approximate lighting color but can't replicate the full spectral output of a real bulb. If your visualization looks warmer than expected, mentally adjust one notch cooler in real life (e.g., if 3000K looks too yellow, aim for a real-life 3500K bulb).
- Scale Confusion: Digital screens can distort perception. Place a real object you know the dimensions of (a standard chair, a sofa, a coffee table) in the frame alongside the virtual lamp. Comparing proportions against a known quantity helps recalibrate your perception quickly. Another trick: cut out a cardboard template of the lamp's base and shade diameter to place in the room for a physical reference.
- Catalog Gaps: Retailer AR apps limit you to their own inventory. If your dream lamp isn't available, don't despair! Use an AI visual search tool (like the one at Find a Lamp) to upload a photo of your preferred lamp and find the closest matches across broader, multi-brand catalogs. Universal AI tools like DecorViz allow cross-shopping across multiple brands, making them far more useful for homeowners with specific aesthetic targets.
Pro Tip: Validate any lamp choice through at least two different apps or platforms before purchasing. If the fixture looks compelling in both IKEA Place and an AI-powered visualization tool, your confidence level should be considerably higher than relying on a single simulation. Different rendering engines catch different potential problems.
Browsing dimmable floor lamps specifically optimized for living spaces or checking playful living room lighting collections can surface options you might never have encountered through a standard keyword search, which brings serendipitous discovery back into the process.
When to Call in the Pros:
While visualization tools are powerful, they aren't a substitute for a professional lighting designer in every scenario. Consider calling an expert if:
- You're dealing with complex architectural features like vaulted ceilings, intricate recessed niches, or long gallery hallways that require specialized lighting.
- You're undertaking a major renovation that involves rewiring or installing new electrical boxes.
- You simply cannot reconcile your visualization results with what you experience in the room during testing, and you need an experienced eye to troubleshoot.
- You desire a truly bespoke lighting scheme that goes beyond off-the-shelf solutions.
A certified lighting designer can save you significant time, money, and headaches by ensuring safety, functionality, and aesthetic brilliance.
What Most Homeowners Miss About Lamp Visualization
Here’s our honest, slightly contrarian take: visualization technology is extraordinary, but the homeowners who achieve truly transformative lighting results treat it as a starting point rather than a final verdict.
We’ve observed a pattern. A homeowner runs a flawless AR simulation, orders the lamp with complete confidence, installs it, and then immediately feels something isn’t quite right. Not because the tool lied, but because screens cannot fully simulate how light interacts with your specific wall texture, the subtle undertones in your wood floor, or the way afternoon sun enters that particular west-facing window at 4 PM. Digital light is approximate. Real light is alive.
The most beautifully lit homes we’ve encountered were designed by people willing to move lamps around after installation, try bulbs at different wattages and color temperatures, swap shades, or angle fixtures unexpectedly. Visualization narrows your field of candidates brilliantly. It saves you from obvious disasters and helps you choose the right *type* of lamp. But the final 20% of lighting magic comes from tactile, real-world experimentation that no app can fully replicate.
Personal taste and creative risk also matter more than "correct" placements. Every lighting formula exists to be broken deliberately. A lamp positioned too close to a wall to create a dramatic wash effect, a pendant hung lower than convention suggests to create intimacy around a table: these choices might look alarming in visualization and extraordinary in reality. Trust the data, then trust your instincts. For more on how to infuse your personality, check out this guide from Studio McGee on breaking design rules.
The most useful mindset is to treat your AR simulation as a confident shortlist. Let it eliminate the obvious mismatches so your real-world testing is focused and efficient. Explore lighting for your style for inspiration that pushes beyond the predictable, because lighting that speaks to your personal aesthetic will always outlast lighting that was simply “correct” by the numbers.
Personalize Your Lighting with Find a Lamp
Lamp visualization is an art form powered by increasingly smart technology, and you shouldn’t have to navigate it alone.
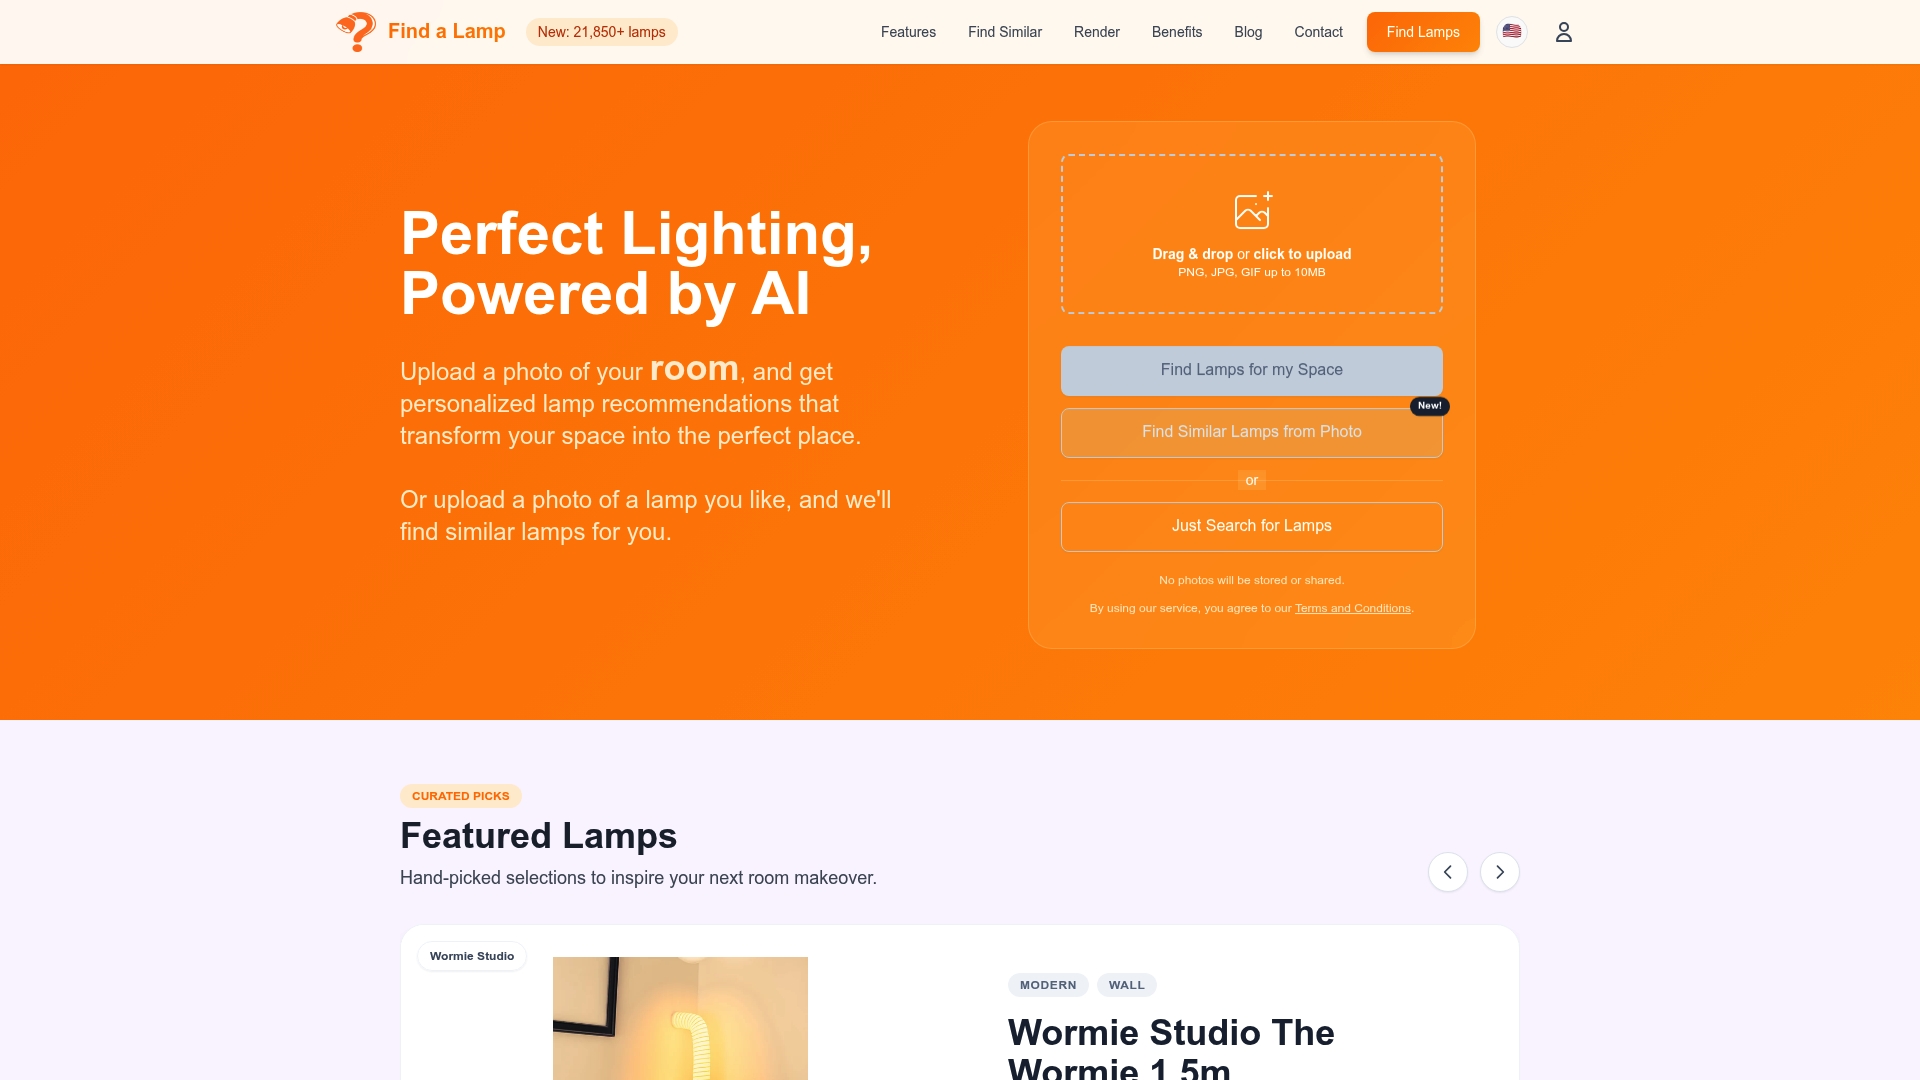
Find a Lamp brings AI-driven lamp recommendations and visual search together in one intuitive platform. Upload a photo of your room and receive curated lamp suggestions calibrated to your existing style, natural light, and layout. Browse room-specific collections like playful living room lighting for spaces full of personality or industrial living room lighting for a more architectural edge. With virtual visualization built directly into the browsing experience, you can move from inspiration to confident purchase without the guesswork that traditionally makes lamp shopping so frustrating. Your perfect lighting setup is closer than you think.
Frequently Asked Questions
What is the best AR app for lamp visualization?
IKEA Place and Houzz are popular starting points, but universal tools like DecorViz (or similar AI-powered platforms) offer broader multi-brand catalogs and more advanced lighting simulation features that retailer-specific apps simply can’t match. For professional-grade precision, BEGA AR+ is top-tier.
How do I match lamp color temperature to my room?
For most residential spaces, aim for 2700K-3500K bulbs. Lean warmer (2700K-3000K) for cozy, relaxing areas like bedrooms and living rooms. Opt for slightly cooler, neutral white (3000K-3500K) for kitchens, home offices, and bathrooms where task clarity is more important than a warm ambiance.
Are AR lamp visualizations accurate?
Most AR apps provide realistic placement and basic lighting effects, offering a very good approximation of scale and general light spread. However, they approximate rather than perfectly replicate real-world light behavior, particularly when it comes to subtle color rendering differences, complex shadow patterns, and how light interacts with unique surface textures. Use them as a highly reliable guide, not an absolute truth.
Can I use AR tools to visualize lamps from different brands?
Retailer-specific apps (like IKEA Place) confine you to their own catalogs. However, universal AI-powered platforms and some third-party AR apps support lamps from multiple brands and styles. These are a significant advantage when you’re cross-shopping for a specific aesthetic, price point, or simply want more options beyond a single store's inventory.